Sunday, August 05, 2007

StuGs and 8-Rads

Continued from Fallschirmjagers.

I've been working on my Fallschirmjagers quite a bit lately, including some of the vehicles I plan to use to support them. As you can probably tell from the title of this post, those will include some Sturmgeschutz IIIG assualt guns (StuGs) and SdKfz 231 armored cars (8-rads). The 8-rads are purely a point-filler for my 800 point Infantry League force. Ninety points for a pair of 8-rads is a cheap way to give my force another platoon, plus some much needed mobility. By saying that they are a point filler I mean that the choice to add them to the force was based on game rather than historical factors.

The StuGs won't see use until I expand to a full 1500 or 2000 point army. Unlike the 8-rads, the StuGs are a solid historical choice for supporting my fallschirmjagers. They were often attached as support throughout the war, and in the late war period there were at least two fallschirmjager sturmgeschutz brigades.

Unlike my Soviets, which are based on forces that fought in a specific battle, my fallschirmjagers aren't based on a specific unit or point in time. Rather, they are meant to serve as any fallschirmjager unit in a European setting (east or west) from '43 to '45. More specificaly, I want them to be able to serve as both a reasonable op-force for my Soviets on the Eastern front during the mid-war, and as any of the fallschirmjager units fighting in Normandy or during Market-Garden during the late-war period.

For my vehicles this means a dunkelgelb as opposed to a dunkelgrau paint job, or so I thought. When it came to the 8-rads things actually become a bit more complicated. Whenever I start to paint a new type of unit or vehicle I try to do some research to find out the best way to do this. Most of the time this involves some web searches and the purchase of an Osprey book or similar book. In exploring 8-rads I ended up getting both and Osprey book on German armored cars and a Military Vehicles in Detail book specifically on 8-rads.


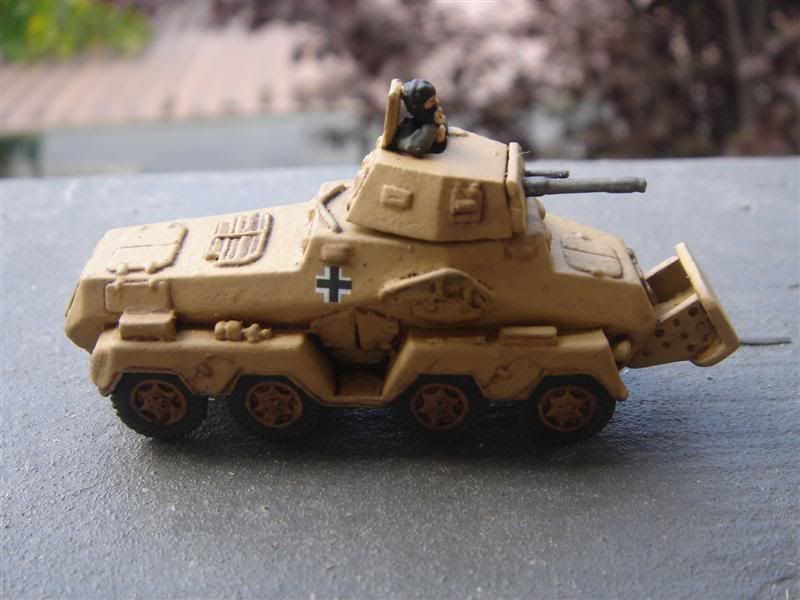
I had two main concerns, The first was whether or not to put the cow-catcher like device (called a pakschutz) on the front of the vehicle, and the second was how to paint the vehicle. My initial research based on the web and the Osprey book indicated "yes" to the pakschutz and a dunkelgelb paint job, so that's what I started with. Unfortunately, after I got the book specifically on 8-rads I discovered a few things. First, the SdKfz 231 that is sold by BattleFront actually stopped production in 1942. After that only the command model, the SdKfz 232, was produced, and that most of these appear to have been produced with thicker armor instead of the external pakschutz.

While early versions of the SdKfz 232 featured large wire frame antennas, advances in radio technology meant that later versions were very similar externally to the 231 and identical in combat performance (the difference was the better radio). As a result, it would appear that the unit in Festung Europa is actually meant to represent this model rather than the one actually listed in the book.

After finding all this out I realized that 8-rads probably either had the pakschutz or were painted dunkelgelb, but that it's quite possible that there was never an 8-rad with a pakschutz painted dunkelgelb. By the time I figured this out I had already painted the base coat on the models with the pakschutz attached, so I just decided to go with it instead of starting over. My story is that these are older 8-rads that were re-painted dunkelgelb.

As for camo, despite these being used as reconaissance vehicles, I found few pictures showing them in camo, so I decided to leave mine plain dunkelgelb.


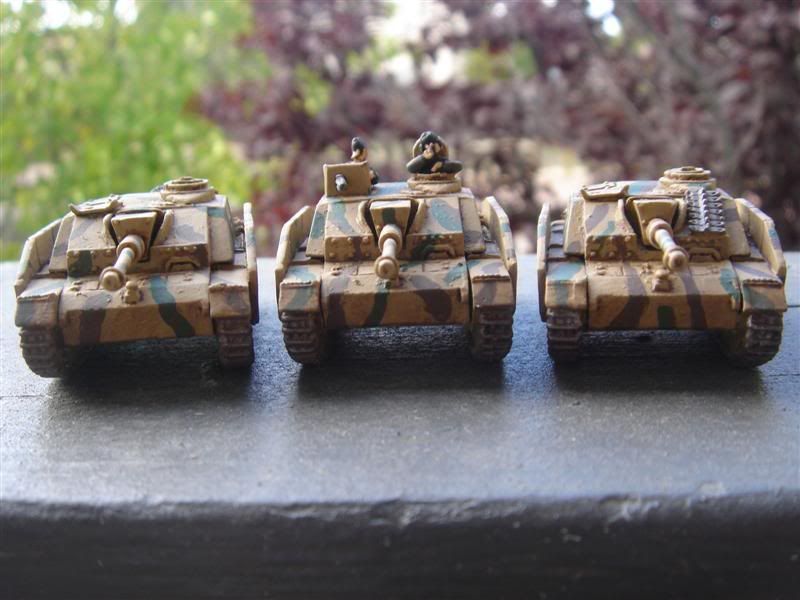
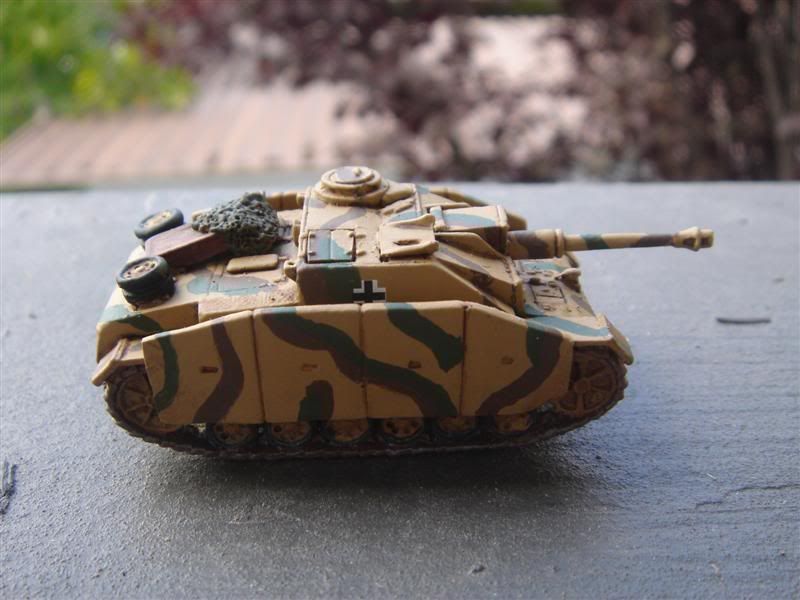
The StuGs were a different matter. Since I plan to eventually use them as support in Normandy, I tried to find out what paint job the fallschirmjager StuGs used there. Unfortunately, I wasn't able to find any definitive sources. Instead, I ended up doing a variation on a couple different '43 and '44 camo schemes that I saw in books and photos. I also took inspiration from a picture I've seen of tank camo being applied with a mop. I figured the brush I was using was pretty close in scale to what was actually used to paint the tank, so I didn't worry too much about cleaning things up.

I don't like to do much weathering. It's probably more realistic to paint on a lot of dirt and mud, but I prefer a cleaner look to my models for the tabletop. I limited the weathering to a bit of dirt drybrushed onto the tires and mudguards. The final detail was to apply balkenkreuz decals to the sides of all the vehicles.

That should do it for my vehicular support for my fallschirmjager. Now to continue on with the infantry. I'm almost done with the first two platoons. Next up is assembling and painting a mortar platoon, probably followed by either an MG platoon, AT platoon, or 3rd infantry platoon. My goal is to eventually have all combat, weapons and non-divisional support options available for both mid and late war.
Thursday, August 02, 2007

Book Review: War Without Hate

War Without Hate: The Desert Campaign of 1940-1943 by John Bierman and Colin Smith (also published as The Battle of Alamein) is the best single volume book on the war in North Africa that I've read. The title refers to the air of chivalry that still existed between British and German forces during this phase of the war. The authors are British journalists, and the focus is naturally on the British side of the conflict.

The book covers from the entrance of Italy into the war until the final capitulation of Axis forces in Tunisia, but the primary focus is on Operation Crusader and the battles around El Alamein. Around a dozen maps do an adequate job of illustrating the actions described in the text.

From the gamer's perspective there's probably not much to gain here other than a good general knowledge of the history of the conflict. The focus is at too high a level to provide much in the way of inspiration for a company level game like Flames of War. There are a few good photographs, but not that many.

I still recommend the book as a well-written primer on the military aspects of the war in North Africa.

Wednesday, July 11, 2007

Fallschirmjagers


A while back our group started talking about doing an 800 point infantry league, so I decided to start looking at what kind of force I could put together. Of course, I could continue my Soviet force, but this was an opportunity to get another army started.

I was very resistant to the idea of doing an elite force, but the more I looked at it the more I thought that doing that kind of force would be the best way to go. So, that meant probably SS, Fallschirmjagers, Rangers, or Parachute Infantry. Since I was still looking for an opposition force to my Soviets, I ruled out doing another allied force early on. That left the Germans. A Waffen SS force might have been interesting, but there are a lot more resources for the Fallschimjaegers that are readily available, plus they don't have the same kind of political overtones that the SS obviously have.

Later, after doing some more historical research, I discovered that while there were no Fallschirmjagers involved in the Second Battle of Kharkov, there were some involved in heavy fighting further north near Leningrad just a week prior to the fighting around Kharkov. So, while whatever force I end up building won't be an accurate opponent for my main force, they would be one for a similar force from the same period.

The idea now was to create a force that could be used with reasonable accuracy both on the Eastern front in mid-war, especially mid-1942, and preferably also in late-war Normandy and Market-Garden since at least one member of our group is working on a late war allied force.

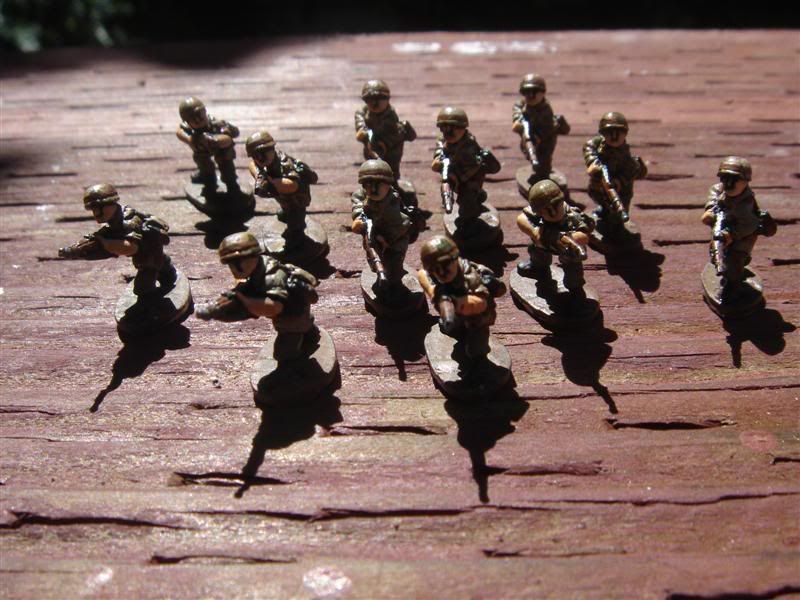
Of course, that dictated a european as opposed to a mediteranean color scheme. I decided that the majority of the models would be wearing the european splinter camo jump smocks and helmet covers but with a few scattered plain green smocks and covers since my sources indicate that they were used throughout the war by some individuals and units. One of the photos I have even shows a full squad in Normandy with the old smocks.

The next thing to do was to come up with a paint scheme. There are three published painting guides from Battlefront for fallschirmjager, all three of which differ to some degree from each other. In addition to those, I looked at a couple Osprey books and an old squadron/signal book for color scheme ideas.

I ended up using mainly the first and second Diving Eagles books with some supporting evidence from the Osprey book German Airborne Troops 1939-45, and came up with the following scheme:

Basecoat: spray black
Helmet: German Grey (995), Green Grey (886), or splinter camo
Smock: Green Grey (886) or splinter camo
Pants: German Fieldgrey (830)
Faces and Hands: Flat Flesh (955)
Boots: Black (950 or just the undercoat)
Rifle butt, canteen, helmet band: Beige Brown (875)
Gun Barrels: Gunmetal Grey (863)
Ammo Pouches, breadbag: German Camo Beige (821)
Webbing, Pistol Holster: Chocolate Brown (872)

Splinter Camo
Base: German Camo Beige (821)
First Color: German Camo Medium Brown (826)
Second Color: Reflective Green (890)

The webbing was actually the hardest color to pin down. The first Diving Eagles lists Chocolate Brown, the second lists Black, and the latest in Ostfront doesn't list anything. The Osprey book mentions that Luftwaffe forces regulations called for brown leather while Wehrmacht called for black leather. As a result, Fallschimjaeger used mostly brown webbing, with an increasing amount of black Wehrmacht gear mixed in as the war went on. Since my force is based primarily on an early-42 force, I decided to go with the brown webbing for the entire force.

I use the techniques described in the second Diving Eagles book for painting the splinter camo. The base coat over the whole smock/helmet cover. The German Camo Medium Brown in geometric shapes on top of that, with Reflective Green geometric shapes on top of that with some green lines in the spaces left.

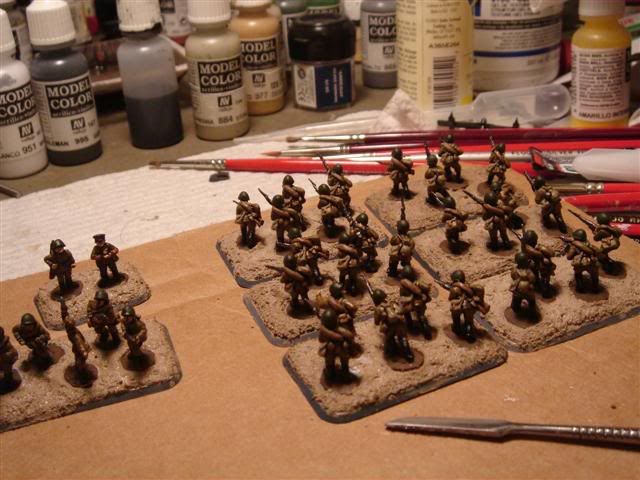
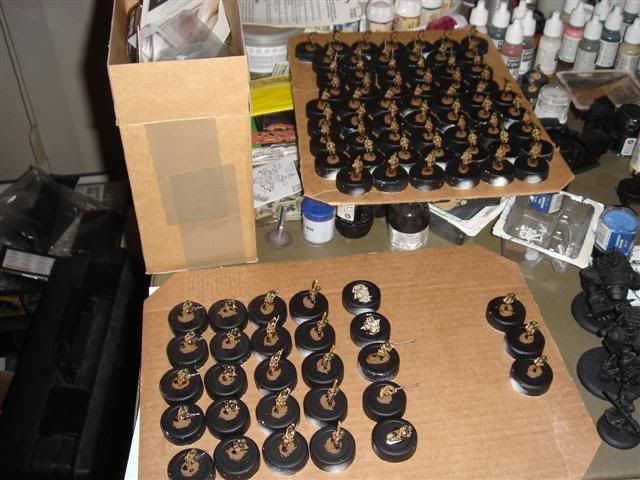
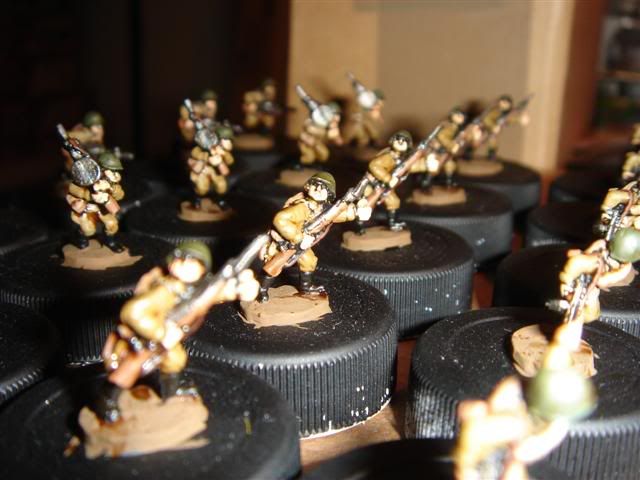
So far I've only got a dozen finished soldiers (seen above), but I plan on making them my primary painting project now, so I should be able to get some more done soon. First up is the rest of the fallschirmjagerkompanie box, and a couple of 8-rad armored cars. That will give me enough to field a force supported by the Italian carri platoon that I painted up years ago.

Continued in StuGs and 8-Rads.

Sunday, May 27, 2007

The Horde Grows

Continued from Painting the Hordes.


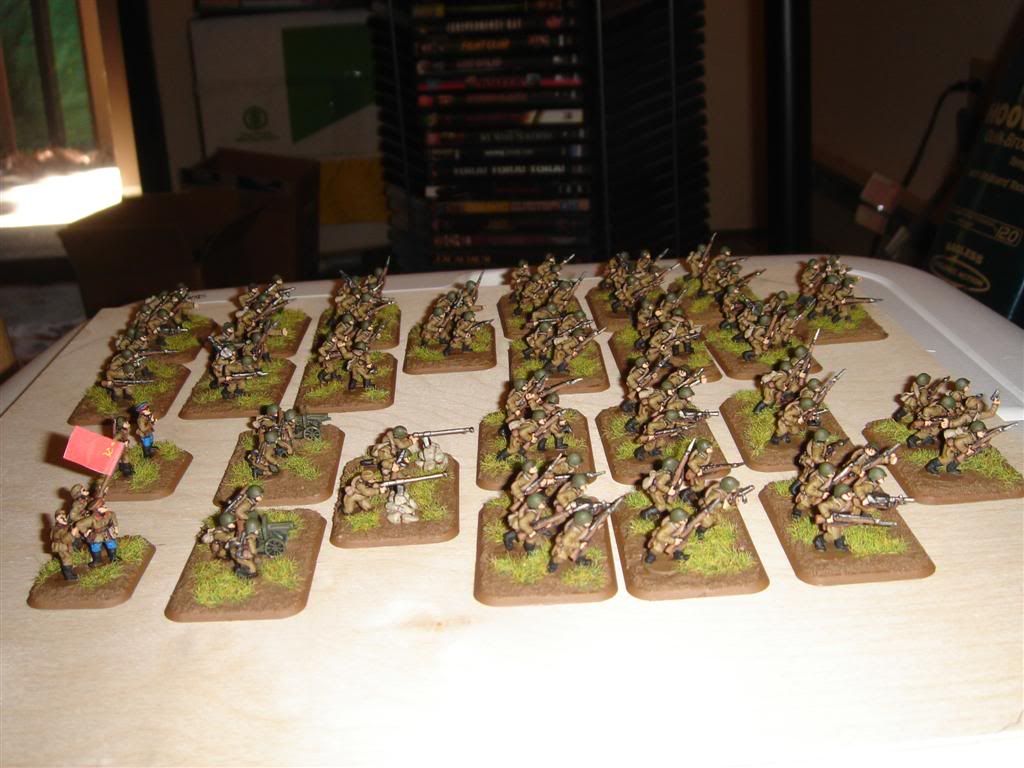
It's been almost a year since I've updated the progress on my Soviet forces. Since then I've established a pretty solid core force and am continuing to add additional options to it.

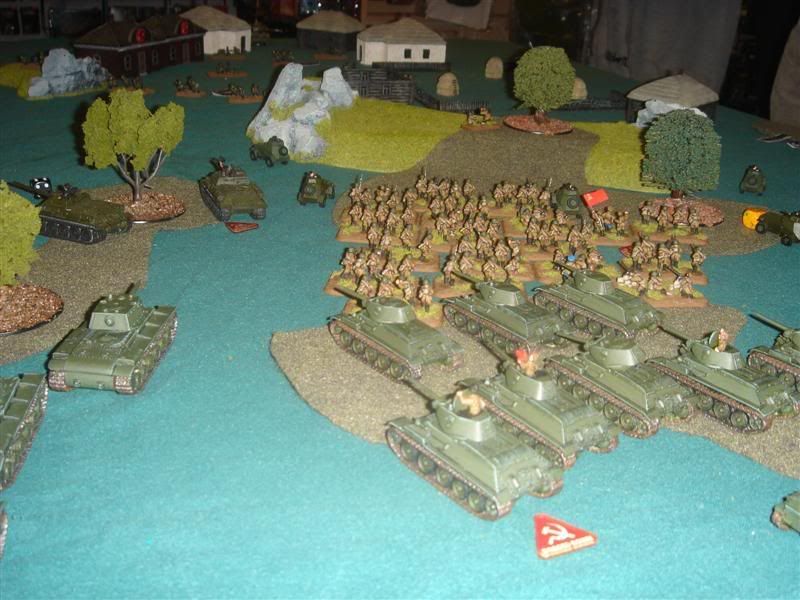
I can field a two to three thousand point mixed tankovy batalon, or an 800 to 1500 point guards strelkovy or motostelkovy batalon.

I still don't have the sheer number of infantry stands necessary to field a regular strelkovy batalon, except maybe at 800 points.

Here's the armory as it currently stands:
T-34 obr 1941: 10
T-60: 7
KV-1e: 4
KV-2 Turret: 1
BA-64: 4
Tankodesantniki: 9
ZIS-5 Trucks: 6
37mm obr 1939 Guns: 4
Katyusha: 2
Rocket Loading Teams: 2
ZIS-3 Guns: 4
Command Stands: 4
Komissar Stands: 3
Infantry Stands: 21
AT Rifle Stand: 1
MG Stands: 2
Observer Stands: 2
Staff Team: 1
Dismounted Cossack Command Stands: 4
Dismounted Cossack Komissar Stand: 1
Dismounted Cossack Stands: 8

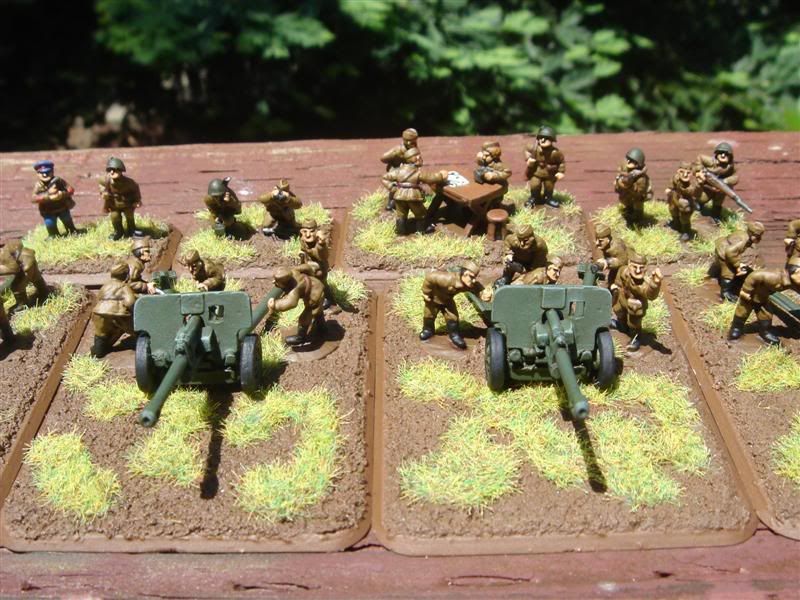
There's still a lot I want to add to this, especially more infantry stands so I can field larger strelkovy companies, but with the completion of the ZIS-3 gun teams my Soviets are moving to the back burner as I work on getting my Fallschirmjaeger ready for battle.

Next up, once I get back to the Soviets, will most likely be an SMG platoon and some heavy mortars. Other possibilities are a pair of SU-152 assault guns (currently waiting on some hatch covers from New Zealand), and a platoon of KV-1s tanks (also waiting on some hatch covers).

Further out are some 45mm obr 1937 AT guns and some more infantry teams to let me do larger strelkovy batalons.

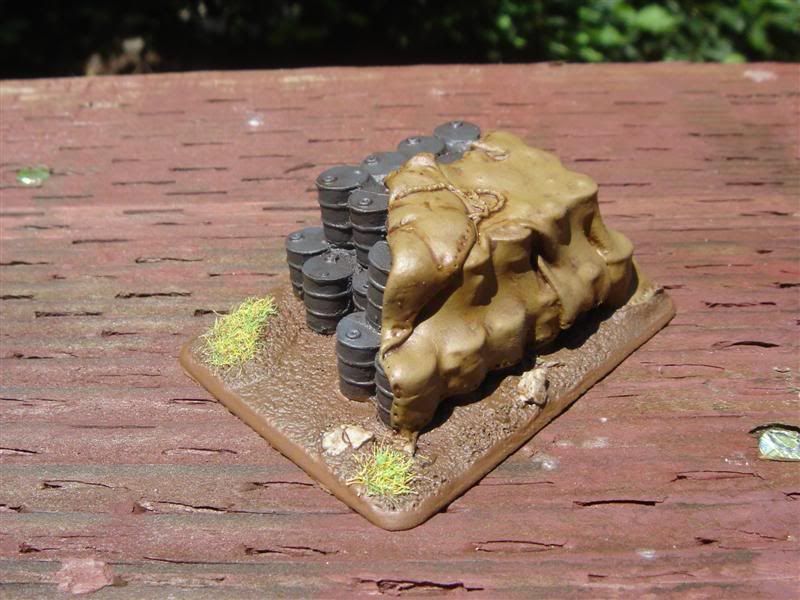
Finally, I also managed to paint up one of the objectives I've been using:

Tuesday, May 22, 2007

Rules Changes for Soviet Armored Forces in Flames of War

Before getting into why I think changes are needed in the way that Flames of War handles Soviet armored forces, I want to first say that I think Phil Yates has put together a wonderful game. It got me into the WWII miniatures gaming hobby and has brought a lot of other people into it as well. It's a fairly well balanced, playable game that does a decent job of simulating many historical factors.

Unfortunately, I have come to think that the representation of Soviet armored forces in the game is probably the poorest in terms of historical accuracy. Instead of trying to accurately represent the way that Soviet tanks were actually employed at the tactical level, the game instead attempts to create the perceived historical flavor of the army at the strategic level: an army of huge numbers but little skill.

It does this through two methods. First, the Hen and Chicks rule which simulates the lack of command and control ability in Soviet armored units. Second, through the army lists which encourage the purchase of large tank formations.

The problem is that the Soviets rarely fielded their tanks in large formations at the tactical level. At least not until late in the mid-war period, although such formations appear to have been more common as the war transitioned into the late-war period.

Historical Evidence


I am going to digress here for a moment and discuss the German army lists. If you get the chance to read the Panzer Truppen books by Jentz you will easily recognize them as the source for much of the way that the German armored lists are put together. Both the organization charts and the combat records demonstrate this. The latter in the way that you can take different tank types in a single platoon. The combat records often describe situations where one PzIV and two PzIIIs are tasked to operate as a single combat element, and similar situations. The army list was obviously built to accommodate this kind of grouping in addition to the formal paper organization that grouped all tanks of a particular type together.

The problem is that as you read those German combat records you'll notice something else. The Russians fielded their tanks in the same way. The game forces you to field homogeneous units and encourages that they be large in size, but the German accounts usually describe small units of mixed tanks being fielded. Not just different kinds of medium tanks together, or different kinds of light tanks together, but often a mix of medium and light tanks. A large homogeneous unit was most definitely the exception rather than the rule, if you go by the available records.

Several of the German accounts basically describe a situation where small units of mixed Soviet tanks have to be dealt with in turn. Fortunately for the Germans these tanks aren't employed en mass so that while they might be outnumbered in total, they are able to outnumber the enemy in each individual combat.

Problems With Current Rules Defined

In some ways the current rules create the same result but through different means. When dealing with one large unit of tanks, on a table with a reasonable amount of terrain, it becomes difficult to bring all of your weapons to bear on the enemy. This somewhat recreates the Russian problem of bringing all their forces to bear. It does so in a completely backwards way though, by replacing several uncoordinated smaller units with one huge unit that simply is too big to maneuver.

So, what I want to do is come up with a different set of Soviet special rules that recreates the way that Soviet armor was actually used while maintaining overall game balance. The goals are as follows:

1) Allow for mixed units of armor.
2) Allow for the employment of multiple small units of armor, and even encourage it.
3) Somehow take away the advantage that multiple small units have over single large units under the core Flames of War rules.

One and two are pretty easy to manage. They simply require a reworking of the army lists to allow tanks to be taken together. Take away the multiple tank cost discount.

The last one is a bit more difficult. Perhaps alter the Centralized Control rule to allow Soviet tanks to be fielded as actual platoons. Alternately, come up with some variation on the normal command range rule mitigating some effects of being out of command, but within certain limitations. The result would allow for some maneuvering but without the flexibility of having separate units. Part of this could result in separate sections having independent break points. Perhaps a two stage command system where the second, longer, command range forces any section outside of that range to have separate break points.

These are all solutions I considered before coming up with something a bit more simple and which wouldn't require any reworking of the army lists.

Proposed Rules Changes

Be aware that these changes only apply to Mixed Tankovy Batalons, not regular Tankovy Batalons or any other forces that happen to contain tanks. The regular batalons represent the changes that were made in mid-43 in part to fix the problems that these rules are meant to represent. I may also propose a change to the hen & chicks rule for these later batalons, but if I do that it will be in a later article.

The solution I finally decided was worth playtesting goes like this:

1) Pick a Mixed Tankovy Batalon as normal from the existing mid-war list
2) Select your commander as normal and remove him from his company
3) Divide each company of tanks in your force into four equal parts, or as equal as possible.
4) Combine parts from different companies to come up with four mixed units that are as equal as possible in number (not including the commander).
For example: if you have 7 T-60, 10 T-34 and 3 KV-1e tanks, and you took one of the T-34 tanks as your commander, then you'd do the following:

The T-60 tanks would be divided as follows: 2/2/2/1
The remaining T-34 tanks would be divided as follows: 3/2/2/2
The KV-1e tanks would be divided as follows: 1/1/1/0

The final four groupings would be as follows:

Tanks: T-60/T-34/KV-1e
Group A: 2/2/1
Group B: 2/2/1
Group C: 2/3/0
Group D: 1/2/1
5) Those four units are now treated as separate companies in your Tankovy Batalon.
6) Ignore the Hen & Chicks rule, and instead replace it with the following:
Roll four skill tests at the experience level of your armored units. Each successful check results in one group of your choice that is able to move that turn. The remaining groups may take any action except moving, which means they can still shoot. The commander can always move and shoot, and does not require an activation to do so. The commander can also attach himself to any of these groups as normal, and if he does then they activate in addition to any activations that you rolled.

The result should be a more accurate representation of how Soviet armored forces operated prior to Kursk. You will now have to choose between slowly moving your forces up in pieces as you get the necessary activations, or sending only a fraction of them in quickly.

The only thing that really concerned me is that the 5+ activation for conscript units might be too harsh, but the ability of the commander to activate one unit for free should balance this out. If it does still prove too harsh, then it might be worth trying a flat 4+ activation number, but for now I want to tie it to the current skill/motivation system already in place.

If having the commander be able to automatically activate a unit proves to make the Soviets too powerful, then try taking that ability away from him. He can still move and fire as much as he wants on his own.

I have not yet had the chance to playtest these changes, but would love to do so, and would also love to hear from anyone else who decides to give these changes a try.

Saturday, February 17, 2007

Book Review: Russian Armour Volume 2: Light Tanks

There are several sources out there now for most armoured fighting vehicles of WWII. Osprey and Squadron/Signal between them cover most of the vehicles used. The more famous, like the Tiger and Panther tanks, often have multiple books available covering their statistics and history in extreme detail.

Despite those sources, there are still some holes to be filled in the available reference material, and Light Tanks does a decent job of filling some of them.

First the good stuff. This book covers the light tanks and tankettes that the Soviet Union produced prior to and during WWII. These include the T-27, T-38, BT, T-26, T-40, T-50, T-60, and T-70 tanks. Many of these haven't had much coverage in other readily available books.

The book begins with a short overview of the history of light tanks in the Soviet Union, then proceeds with more detailed descriptions of each series in chronological order of development. In addition to the text, each section features period photos, photos of surviving museum pieces, profile line drawings, cut-away line drawings, and profile paintings. The resulting combination provides a lot of interesting information in a compact package.

As a personal note I have to mention that there is a picture included of a T-60, along with KV-1 and a T-34 all from the 121st Tank Brigade in May 1942 "before an attack". This photo was almost certainly taken just prior to the beginning of the second battle of Kharkov, the conflict that my personal miniature force of soviets is modelled to represent. The KV pictured appears to be a KV-1 1941 with a welded turret. It is not a KV-1e, KV-2, or KV-1 1940, and the welded turret would seem to rule out it being a KV-1s or a KV-1 1942. While not a definitive answer to the question of what kind of KV my own force was likely to have fielded, it certainly provides some useful clues. In Flames of War game terms, the KV-1 1941 and the KV-1e (which is what I currently use) have identical stats, but it's still interesting.

Now the bad stuff. First, it suffers from a lack of editing. There are several typos in the stats, such as using 1978 instead of 1938 at one point, using mm instead of m at another, and using T-24 instead of T-34 more than once. Also, it would appear that the author wrote the text directly in English, and that English is not his native language. While it is generally readable, there are several places where his unfamiliarity with English sentence structure shows through.

The worst aspect of the book is one that it shares with other books of this type and that's a complete lack of citations, either in the form of footnotes or a bibliography. There is nothing to indicate where the author is getting any of his information from. It could be from archival research, interviews with survivors, or he could be just making it up. We simply don't know because of the lack of citations. This seriously limits the usefulness of the book for any serious purpose, which is a shame because there are some interesting bits of information here.

It's a bit unfair to criticize this book for failings that exist in most books of this type, but it's become something of a pet peeve of mine so I feel that it's necessary to point out.

If you have any interest in the Soviet light tanks of WWII, then you shouldn't let any of my criticisms prevent you from reading this book as it does a good job of describing the development of Russia's light tanks, as well as providing several good photographs and illustrations.

Tuesday, December 26, 2006

Book Review: Shattered Sword the Untold Story of the Battle of Midway

If you have any interest in the naval combat that occured in the Pacific during WWII, then you need to read this book.

It provides an in-depth re-examination of the conflict utilizing sources that have been available in Japan for at least twenty years, but that haven't made it into any English translations until now. The result is that many of the reasons for the Japanese defeat, long regarded as "fact," are now exposed as fiction. Including the ideas that the Japanese carriers were caught with fully armed and fueled planes on their decks that would have launched an attack within five minutes had they not been hit by the Americans, and that Admiral Nagumo could have taken steps to avoid the initial disaster that befell three quarters of his carrier force during those attacks.

The primary sources for this re-examination are the logs of the carrier air groups assigned to the Kido Butai, the Japanese combined fleet. While the logs of the ships themselves no longer exist, the logs of their air groups do, and the authors' examination of those logs go a long ways towards recreating the course of events that led up to the destruction of Japan's premier carriers.

This account is told almost exclusively from the Japanese point of view, referring to US sources only when necessary to fully describe the situation. At the same time, the authors do not allow themselves to fall into the trap of letting this point of view portray the Japanese sailors and airmen in an overly positive light. While the tales of death and suffering that the Japanese sailors suffer should lead to a level of empathy and pity, the authors remind you that many of these same men participated in actions that resulted in atrocities, including the deliberate sinking of ships full of civilian refugees during the battle for Singapore, and the execution of captured American pilots during Midway itself. They don't bludgeon you over the head with this information, but use it to help maintain a level of balance in what is otherwise a story told from largely one perspective.

The main part of the book is divided into three overall sections. The first describes the events leading up to the battle and the plans that were made to fight it, along with pointing out many of the flaws in those plans. Then comes the bulk of the book which consists of a chronological account of the battle itself. This is followed by an analysis of why Japan lost, an assessment of the battle's importance, and a summary of the myths that have surrounded the battle and why they were created.

Also included is an extensive collection of appendices. These include a Japanese OOB, technical details and drawings of the four Japanese carriers and the planes that flew from them, a short analysis of what would have likely happened had the Japanese attempted to land on Midway as planned, an explanation of Japanese aircraft tail codes, a chronology of Japanese fighter operations during the battle, a strike roster of all aircrews involved in the operation and more. Finally, there is also an extensive section of notes, bibliography and index.

Throughout the text are a number of photographs, maps and diagrams that help illustrate the progress of the battle.

As has been said before of the battle: before Midway the Japanese knew only success, after it they knew only defeat. While the authors make a compelling case in their conclusions that this battle should not be considered decisive, it still marked a turning point in the war, whether it actually caused that turning point or not.

Whether you have prior experience in studying the battle of Midway or not, this is an excellent, well-written book that should provide you with new insights into it.

Sunday, October 22, 2006

Cause and Effect in Flames of War

In discussing game design, particularly designs that attempt to simulate some real-world subject, it's common to hear the terms "design for cause" and "design for effect." It's easiest to show what these terms mean with some examples.

In designing for effect the designer generally has an idea of how the game should play and creates a set of rules that will result in that effect. An example of designing for effect in a simulation would be to look at the historical outcome of a conflict and attempt to model a game that achieves the same result with the same inputs. For example, during the early part of WWII Germany often defeated more numerous and better equipped foes in battle. A designer designing for effect will tailor his rules so that the same result will happen in the game.

In designing for cause a designer focuses on the details of the game elements and lets them determine the ultimate effect. An example of this design would be a game that focuses on the armor thickness of tanks and the penetration ability of guns. Easily quantifiable causes.

Most game designs incorporate elements of both methods, and Flames of War is no different. I think it helps to understand how the game works, and why it sometimes doesn't, if you recognize which design theory different elements of the rules follow.

For the most part Flames of War follows the design for effect philosophy of design which is what causes some gamers coming from other historical games problems. Games like Command Decision and other older systems tend to more closely follow the design for cause philosophy. The rule that states that it's the targets skill level that determines the number needed to hit is a classic example of design for effect. It's non-intuitive, but it results in the effect that the designer intended while still being simple to use.

Saturday, October 14, 2006

Flames of War Battle Report

It's been a while since an update. I don't have anything new in the form of painting to report on, but thought I'd write up my latest battles. This is a rewrite of a report I posted on Waryammer along with some photos from the game.

I played two 1500 point games with a Soviet Mixed Tankovy Batalon vs. a German Panzer Kompanie. Both of the armies were lists that I put together since my opponent is still learning the game, doesn't have any models of his own put together yet, and isn't familiar enough with the lists to put together his own.

Setup:

The rough organization for the two lists was as follows:

Soviets, 4 companies:
Light Company: 7 T-60
Medium Company: 9 T-34
Heavy Company: 3 KV-1e (1 taken out to make the Batalon commander)
Tankrider Company of two platoons with AT rifles and MG teams.

Germans, 3 platoons:
Command: 2 Pz IV F2, and a recovery vehicle that was pretty useless on this "table"
First Platoon: 1 Pz IV F2, 3 Pz IV F1
Second Platoon: 4 Pz IV F1
Armored Panzergrenadier Platoon with three squads and panzerknacker command team.

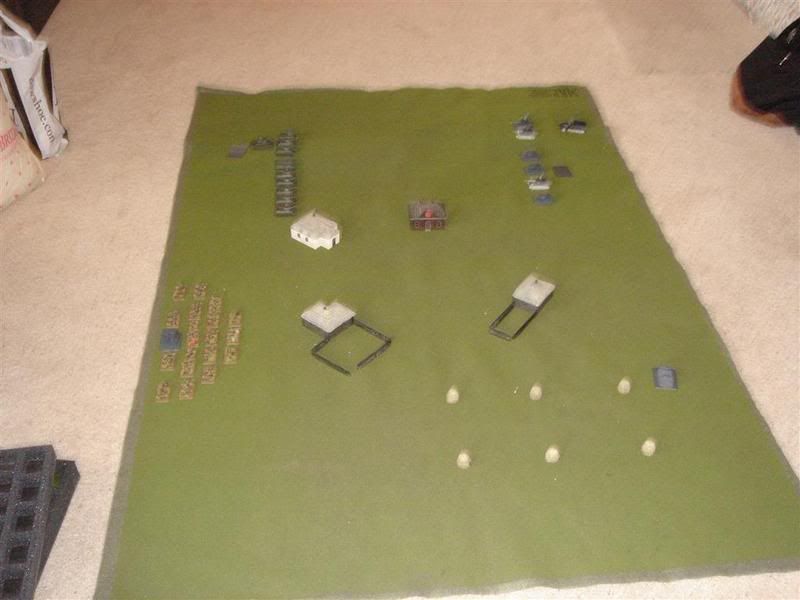
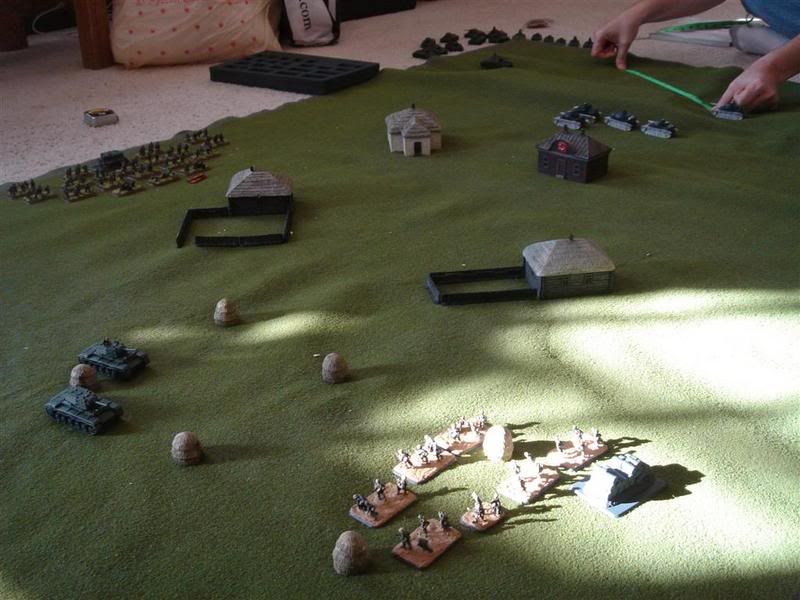
The "table" had a bare minimum of terrain. A couple of hills on one side, most of the contents of the Eastern Front "Battlefield in a Box" in the middle, and a field outlined using the haystack markers from the "Battlefield in a Box" on the other side. It's hard to see the hills in some of the photos because they were made by simply putting some VHS tapes under the battle mat. We rolled to determine the scenario and got Encounter.

I elected to keep my light and heavy companies in reserve, he kept his panzergrenadiers and second platoon in reserve.

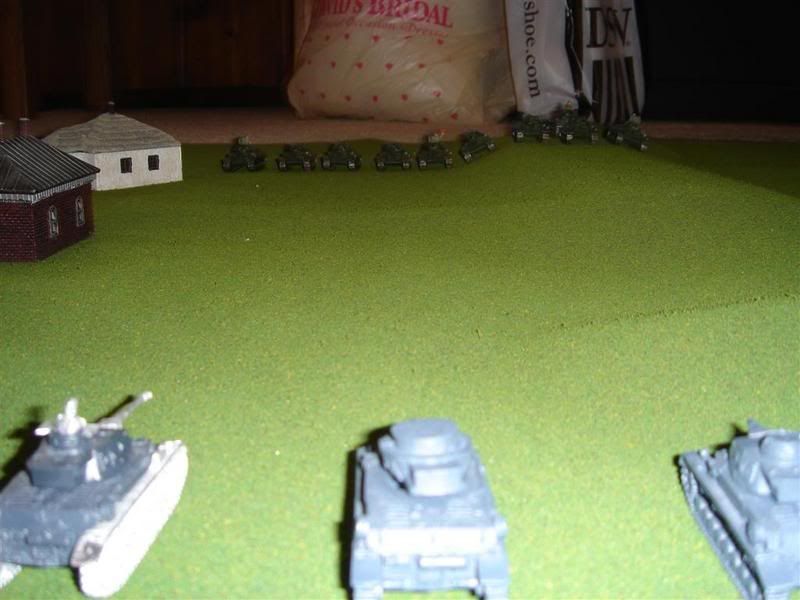
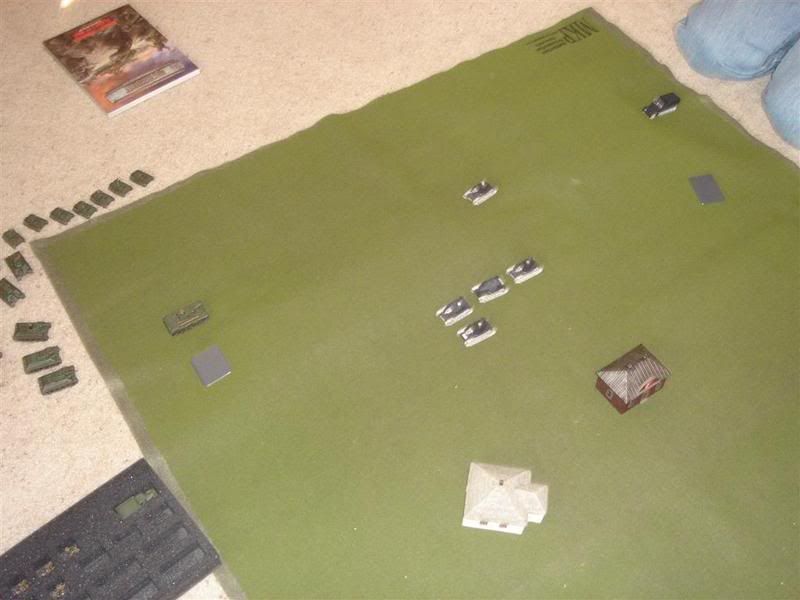
He had to place first and put out his first platoon near his right hand objective. I put my infantry around my right hand objective, then placed my medium company opposite his first platoon. We each then placed our commanders. You can see the overall setup in the slightly blurry first pic above, and a view from the German point of view below. Ignore the upside down turret on the Pz IV. It wasn't knocked out, it just got set up that way somehow and I didn't notice it until after I took the picture.


Game 1:

After setup he got to go first and made a rather grave tactical error. He's only played in two games before, both of which were on tables with a large amount of terrain, and it's been a while since I played on a more open table. As such neither of us thought about it that much when he chose to charge my medium company with his first platoon and command elements. They took out one of my tanks, and then on my turn I chose not to move and simply returned fire. Sixteen shots can do a lot of damage, even to Veteran troops. He ended up losing everything in that one round of combat, forcing a company command check at the beginning of his next turn which he automatically failed for lack of a company commander.

Well, that was quick.

Game 2, Turn 1:

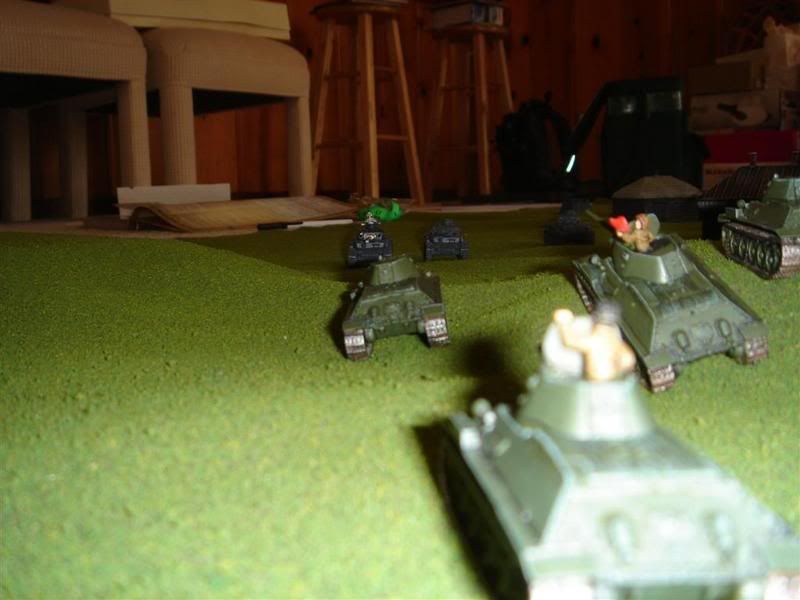
We decided to just start over with the same forces and the same scenario. This time I got the first move and moved towards his forces, but trying to keep the hills between me and him for as long as I could. I couldn't hide from his entire force though, so he got some shots off at long range on his turn and took out a couple tanks.

Turn 2:

The next turn I was thinking I could double time between two hills so that he couldn't get shots off at me in the open, but I had forgotten about the rule on double-time movement that says you can't get within 8" of an enemy unit. His command teams on the hill thus prevented me from using double-time to get to where I wanted to go.

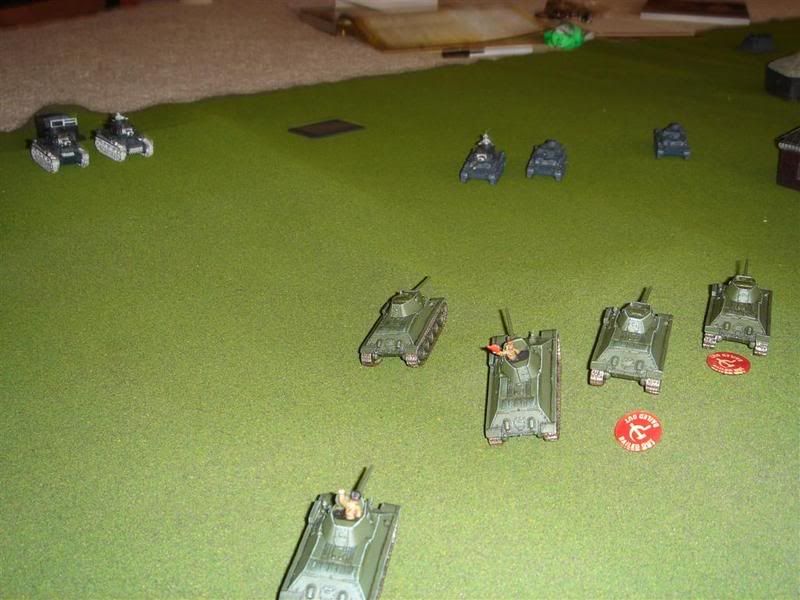
Instead, I went ahead and moved in between both hills and into the line of fire of his first platoon. I only moved 6" so I could get off some shots, and did some damage, bailing one and killing one, but neither of those was a Pz IV F2. On his turn his three F2 tanks were now in range and tore me apart, but I was able to make my motivation check.


Turn 3:

Turn three I was able to try a roll for reserves but failed. I then moved my remaining T-34s into position and managed to take out another of his tanks from the first platoon. Since the bailed tank was still bailed he was forced to take a motivation check and failed. Things weren't looking too good for him at this point as he'd have to make a company morale check to stay in the game unless he got some reserves on the table.

Fortunately for him he made his check; unfortunately he didn't get any reserves so he'd have to make another check the next turn. He did manage to knock out another T-34, but I passed my motivation again. I was now down to 3 tanks in my medium company, so it wasn't going to last much longer either.

Turn 4:

Turn four was looking good for me at first. I made both reserve rolls and my remaining T-34s moved to take one of the objectives. Unfortunately, my heavy company came in on the opposite corner. I was hoping my light company would come on there, because they could almost reach the undefended objective on that side of the "table" in one turn if they double-timed.

I decided to double-time both my heavy and light platoons. This worked out for my heavies that managed to avoid breaking down due to being unreliable. It wouldn't work too well for my poor T-60s, but we'll get to that in a moment.

I still couldn't get rid of his pesky command elements, but things weren't looking good for him. He had a swarm of T-60s moving up behind my remaining T-34s all headed for one of his objectives while the heavies were slowly moving towards his other objective. He was going to have to make a company morale check, and even if he made it I was going to grab an uncontested objective. Unless, that is, he got some reserves in the right place.

On his turn he made his motivation check, and was successful on both reserve rolls! His panzergrenadiers came in on the corner close to the objective my heavies were going for, and his second panzer platoon came on to support his company commander.

It was at this point that we ran into a question on double time vs. someone who moves and fires. RoF drops to one if you move and fire, but if your target double-times you double the firing dice. It's unclear if a moving shooter should get RoF 2 against a target that double-timed, but that's the way we decided to do it. As a result I lost my entire light company to fire from the second panzer platoon in one round of shooting.

In the meantime the command tanks took out my medium company commander causing the remaining two tanks to automatically fail their motivation check.

Turn 5:

At this point I flinched. I should have continued to go for the other objective, but I'm not that familiar with tank vs. infantry combat and I decided to fall back instead and force him to go on the offensive. After all, I had my infantry dug in on one objective, and my batalon comander was sitting on the other in his KV-1e. So, I decided to try to move my other heavies over to help out the batalon commander.


He decided to try to take my commander with his remaining tanks after I carefully explained the odds to him (for example, that it was impossible for his Pz IV F1 tanks to do anything to me from the front, so he'd have to come at me from the flanks to have a hope of doing any damge with them).

He moved his command tanks up one side of the hill and his second platoon up the other side to try to keep in cover as they approached my commander.

Turn 6:

Unfortunately for him, I was able to move into a firing position, and despite needing a 5+ just to hit managed to take out his 2iC. At this point his odds of winning a fight with my commander dropped, but he decided to press on. In the meantime I wised up and realized that it would take forever to move my other heavies to a position where they could help my commander, and that they stood a fair chance of forcing his panzergrenadiers out of position if they assaulted, even though his panzergrenadiers had managed to get into the cover of the wheatfield and dig in while I'd foolishly backed off.

Turn 7:

Turn seven saw me move my commander again and take a potshot at his second platoon, but I missed. My heavy company assaulted his panzer grenadiers forcing them to fall back after losing a team, but they were still in range to contest the objective.

He moved up all his tanks into firing positions against my commander, but wasn't quite able to get on my flank. He did get a hit from his commander, but I made the armor save.

Turn 8:

On Turn eight on the other side of the table I shot his panzergrenadiers with my tanks' MGs but only destroyed one stand, while the following assault didn't get any. Their failed tank assault check forced them to break off again, but they still managed to stay close enough to contest the objective.

Meanwhile, my commander had missed both of his shots at the panzers.

On his turn, my opponent managed to surround my commander and take him out with a flank shot by his commander. He was now on the objective and it looked like he would win at the beginning of his next turn as there was no way for me to contest his control of the objective.

Turn 9:

I almost conceded, but decided to fight out the last turn for points if nothing else. I fired up his remaining panzergrenadiers with the MGs of my heavy company and this time the results were much better, taking out all his remaining MG teams and leaving only his command team which then failed its motivation check. This in turn would force a company morale check at the beginning of the German player's turn, before the check for victory conditions, something that I hadn't thought of until that moment.

So, the whole game came down to one die roll with a 50/50 chance. 4+ and the Germans pass and win for holding the objective. 3- and the German commander suddenly decides that he's had enough and retires from the field. The roll: 3. Soviets win!

Conclusion:

The second game played out a lot like the kind of actions I've read about occurring during 1942 in Russia. Handled well, the Germans could take the more numerous Russians as seen in how they dealt with my medium and light companies, dishing out massive tank casualties compared to what they took. They still had trouble with the heavies though, which just kept taking everything that the Germans could throw at them. Usually only well executed flanking maneuvers stood a chance of taking them out, which is exactly what happened in the game.

Even though he didn't have any 88s or big cats to deal with my heavies, the German player still came within a single die roll of winning the game. Overall one of the better games I've had in a while despite only being 1500 points and on a "table" largely devoid of terrain.

Sunday, September 17, 2006

Advanced Squad Leader

A long time ago, in a state far far away, there was a teenager who was interested in WWII and wargaming. That teenager scrimped and saved and eventually came up with enough cash to buy a phonebook sized rulebook with the name Advanced Squad Leader along with a big box with the name Beyond Valor on it. I don't remember exactly how much it all cost, but it was expensive. Somewhere around $100, which was a huge amount for me at the time.

I spent hours reading over those rules, punching out counter, setting up maps and attempting to play out the scenarios that I had. It was a lot of fun when I got it all together, but I never did fully master everything. After I got out of college and found myself with less freetime I put the rulebook and box away and moved on.

Now, over a decade later, I find myself getting sucked back into a game that has been described as a "lifestyle" by some. Perhaps the geekiest lifestyle in existence. The trigger this time is the Advanced Squad Leader Starter Kit series. The first game in this series has been out for a couple of years now (in fact, it's currently out of print, although the new printing should be released soon), but I just now broke down and got it, along with the second in the series.

The game is complex. The full rules are close to 200 pages, the starter rules only twelve, but those are twelve pages of small type. Almost everyone who plays seems to suggest learning from another player rather than trying to learn on your own.

So why play? Because more than any other game I've played it recreates the chaos of small unit combat that I've read about and seen in movies. Using the full rules your units can vary in abilities throughout the course of the game as they show their true natures under fire, snipers randomly hit both sides, and heroes can appear to shift the tide of battle. You have overall control of the battle in terms of telling your troops where to go and who to shoot at, but beyond that things are often out of your hands. Each game is often a narrative of bravery and cowardice as the dice dictate what happens below the level of your control.

This is all just at the level of infantry combat, the core of the game. It's the gun and vehicle combat that I was never able to master, and I understand that they add whole new levels to the play of the game.

So, now I'm sucked back in. Playing the Starter Kits for now, but I'm sure I'll be repurchasing the core rules and module again soon. Now if I could just find a face-to-face opponent...

All's Quiet on the Western Front

...or at least on this blog, and yes, I reqlize that the "All's Quiet" refers to WWI and not WWII, but I'm in the west, and things have been quiet here lately, so there!

The fact is that this blog is centered around WWII gaming, and I simply haven't been doing much of that lately. I'm generally pissed off at Battlefront for multiple reasons, and that combined with a lack of opportunities to play Flames of War has caused me to not spend any time working on my Soviets. Although I did pick up the Battlefield in a Box for the eastern front and a box of Shturmoviks.

I have been gaming, just not with WWII games. I've been spending some quality time with my Xbox 360, got to play a few rounds of Arkham Asylum, and even Through the Desert. That's the kind of thing I talk about on my other blog (although I haven't posted there either lately).

I do have some stuff I'm going to be posting here soon, but it's not Flames of War related. It is WWII related though, and gaming related.

I may make a Flames of War related post as well, but if I do, it will probably be a rant on Battlefront.

Sunday, July 30, 2006

Basing the Hordes

Continued from Painting the Hordes


With a horde of little Soviet soldiers all sitting on plastic bottle caps garrisoning my table, it was time to begin the basing.

I set myself two main rules for the basing. The first is that it had to be simple to do. I have a lot of bases to do. The second is that it had to be a method I could easily use on the pre-cast bases on Battlefront's one-piece resin vehicles.

I recently used a very simple basing technique on some larger fantasy miniatures, but it involved using a sand base, which is ruled out by my second restriction of being able to use the method easily on pre-cast bases. Still, I like the method, so I decided I'd use a variation of it. Instead of a sand base I used a pumice base (Vallejo White Pumice) mixed with a darker brown color (Vallejo Model Color 826 German Camo Medium Brown).

I applied the pumice to an empty base, spreading it evenly to an approximate depth equal to that of the base of one of the miniatures. I then put a dab of white glue on the bottom of each of the miniatures and pressed them into the base. Using a sculpting tool, I then smoothed the transitions between the bases and the pumice and removed any extra pumice.

It's easier to spread the pumice onto the empty base than to try to spread it around pre-glued miniatures. I used white glue instead of superglue in the hope that it will be easier to remove figures from the base if I ever want to rebase them. The combination of the white glue and the pumice seems to hold them in solidly.

I mentioned that I mixed the pumice with a dark brown color before applying it to the base. This results in a light tan color that looks pretty good when inked over, but once again this breaks my second rule since I can't easily achieve the same light tan on a pre-cast base, so when it dries I paint over it with the same dark brown color.

After finishing the tank rider company using the above method, I don't think that I will continue to mix the pumice with paint in the future. Instead I'll simply paint over it. This should speed things up a bit and I don't think it will effect the final results.

At this point I originally tried inking the base, but found that any extra detail it brought out in the base was countered by the fact that it emphasized the differences where the pumice meets the edge of the bases of the miniatures. So I decided not to ink the base.

After everything dried I applied some static grass using it both to add some character to the base and to cover up any major flaws in the application of the pummice. I used the same method that I described in the writeup on my dwarf miniatures.

Once the glue dried on the grass I chose a slightly lighter brown (Vallejo Model Color 983 Flat Earth) to paint the edges of the base, and then it was on to the final step of the protective clear coats. I used my standard method of one coat of Testor's Gloss Cote followed by one or two coats of Citadel Matte Varnish.

I'm rather pleased with the results. The bases are nothing special, but I think they do their job of showing off the figures without distracting from them.

I'll save talking about my future plans for this force for the next article.


Continued in The Horde Grows.

Thursday, July 27, 2006

Painting the Hordes

Continued from The Next Step.

While there's not much assembly involved in Soviet Infantry, there is a good deal of preparation involved. I started by buying the Strelkovy Company box and an extra Strelkovy Platoon blister. This gave me most of what I needed to make a full strength Tank Rider Company, plus several extra troopers since a Tank Rider platoon is smaller than a Strelkovy platoon. This is useful since there always seems to be a few damaged or miscast models in a package.

Unfortunately, there are a few other differences between a Tank Rider company and a Strelkovy company, mainly in the options they can take. I wanted to take both a machine gun platoon and an anti-tank rifle squad. Strelkovy companies don't have anti-tank rifles as an option, and only take a single machine gun squad instead of the two present in a platoon. Since neither machine gun nor anti-tank gun squads appear in Battlefront's special order catalog, that meant I was going to have to buy a whole company blister of each in order to fill out my Tank Riders.

I decided to put off that purchase while I got started on my infantry. As I cleaned each model of any extra flash, and straightened any bent weapons, I then sorted them into rows of identical models. This was so I could paint a group of identical models together, which was to prove helpful in speeding the painting process. I also took the worst of the damaged and miscast models and set them aside.

Next I took all the individual models and glued each one to a plastic cap from bottled water using a dab of Elmers' white glue. This gives me something to hold while painting the model. After the model is painted, then I can just pop it off the cap, clean up the bottom if necessary, and stick it on a base.

After that I painted them pretty much the same as I did my tankodesantniki, the only differences being that I tried to pay a little more attention to detail on the face and where different base colors met so that there was a bit of black left as a border. I didn't worry too much about this, just enough so that the wash effect was enhanced a bit.
After this, all that was left was the basing, but I'll go into that next time, along with what I plan to add to this force to bring it to 2000, 2500 and even 3000 points. I'll also go into the changes that I had to make in order to become compliant with the 2nd edition rules of Flames of War.

Continued in Basing the Hordes

Sunday, July 09, 2006

Reactions to Flames of War V.2

So, it's been a couple days now since the mini-rulebook and the mid-war compilation lists came out for Flames of War and the official forums are still full of noise, mostly of the negative sort.

I'm still reading through the rules, but they seem ok to me. There are a few errors, but not too many, and some were caught in time to be fixed in the hardcover printing. The changes seem to be good to me. Some have had problems with some of the changes, but overall it looks like a good revision.

The compilation lists are a different matter entirely. At current count the errata thread has reached 10 pages, mostly with errors related to the two compilation books. Leaving aside the complaints of those who are simply unhappy with changes in their army list, there is simply too much missing or incorrect data. I won't go into details but these are mostly things that could have been caught with more proofreading. They simply should have sent the proofs out to more players for review before sending them to the press.

I'd give them more of a break, but they knew they had problems after they released the preview lists for the minor axis powers. Within hours of release people found mistakes with each of those lists. They should have realized at that point that they needed better proofreading of the whole book and gotten the proofs out to more eyes. The result is going to be the need for large PDF files to correct all the mistakes. The mistakes are so many that people are going to feel compelled to repurchase the books when they are eventually reprinted, undoing much of the goodwill generated with the free rules upgrade.

So, ignoring all the errors, the changes in the lists are a mixed bag. Overall prices dropped on a lot of units, mainly armor and artillery. I've seen some complaints that certain HQ teams have been dropped from units, making them less historical. For example, in the US lists, the halftrack command team has been dropped from the assault gun unit, and the jeep command team from the self-propelled AA unit. This could become a bigger issue after the errata is dealt with as now BF appears to be changing actual historical composition in order to make gameplay easier. Something sure to annoy those of us with an interest in the historical side of things.

Finally, BF response is slow as usual. They have made a few responses to issues, but only a small fraction of the issues brought up so far have been answered. Hopefully, they are going through their notes and trying to figure out what went wrong. More likely they are simply taking the weekend off.

I don't mean to rag too much on BF, but they really botched the mid-war compilation books. Even the fanbois that frequent the official forums have been hard pressed to defend the amount of errors present (although they still jump on anyone who has an issue with an intentional change in the rules or lists).

With that out of the way, how does this effect my armies? For the Soviets that I've been describing it doesn't effect them much at all. I'm dropping the tankodesantniki for a couple reasons. One, they went up in price, which combined with increased costs of air support mean that I either need to drop the air support and add tankodesantniki to the KV-1e tanks, or drop the tankodesantniki and keep the air support. Two, the rules for tankodesantniki changed a lot, and there are a lot of questions about what the changes actually mean, so until some of those questions have been answered I'll probably stay away from them. Besides, dropping the tankos means I don't actually have to paint anything new.

I'm not sure how I'm going to proceed to increase my force to 2000 points now, but I'll be working on that soon. Meanwhile, my German armored company got a windfall of new points to spend, but I'll go into that in an upcoming post.

Tuesday, June 27, 2006

Magic Wash

I mentioned "magic wash" in my Painting the Troops post, but I didn't mention what it was. Magic wash is basically a wash that uses Future floor wax (or its equivalent outside the US, see the link for more info) as part of the mixture.

I've seen similar formulas described elsewhere, but the first time I saw it referred to as "magic wash" was on the Flames of War forums, and most of what I know about it comes from posts made there.

The exact ratio of wax to ink to water varies tremendously. The mix I currently use is 3 parts water to 1 part Future to 1 part GW ink. I've seen ratios that call for much less ink (just enough to get a shade). I've seen ratios that use much less water, even to the point of just being wax and ink. As with most painting techniques, the best thing to do is to just experiment.

I make the mixture in an empty Vallejo paint bottle for easier use and storage.

The purpose of the "magic wash" is the same as any other wash, but the Future helps break surface tension which lets it flow more freely into crevices and depressions on a miniature with less pooling on flat surfaces. The result helps bring out details while helping to smooth transitions between different areas of color on the miniature.

I've only used the method on 15mm miniatures so far, but I plan on giving it a try on some larger scale stuff later to see how it does.

I've found with my Soviet infantry that it really helps cut down on my painting time, but I'll go more into that when I can take some pictures of the infantry I've gotten painted so far.

Thursday, June 22, 2006

Book Review: Across the Dark Islands: The War in the Pacific

Across the Dark Islands is a memoir of Floyd W. Radike's WWII experiences which began as a platoon commander reinforcing Guadalcanal and ended in administrative duties in the Philippines on VP day followed by a short time occupying Japan. The story he tells is an interesting contrast to those told by members of elite Army units such as the paratroopers in Band of Brothers. Radike was not a member of such an elite unit, he was a member of a pre-war National Guard unit used to fill out a Regular Army division.

Radike himself was an outsider in the regiment having been reassigned after attending infantry school. Most of the officers in the regiment had spent years together in the National Guard and the result, according to Radike, was not the most efficient system of selecting combat commanders. Radike describes a unit with few quality officers that suffered from either incompetent National Guard leaders or overly ambitious Regular Army officers at different times in its history. It would be easy to dismiss these criticisms as the whining of a troublemaker, but Radike went on to achieve the rank of Brigadier General in the National Guard following the war, so you have to assume that he wasn't just a square peg in the Army organization.

Despite being utilized in mostly lower-risk assignments on Guadalcanal, Radike's regiment still suffered over 80% casualties due to disease and the environment. Many of the older National Guard soldiers simply couldn't take the heat and had to be sent home. Even though they weren't used as a spearhead in the fighting, Radike's company still saw its share of combat casualties before the Japanese were finally evicted from the island.

After the defeat of the Japanese on Guadalcanal Radike spent time in various duties on the island before being sent with the regiment to New Georgia where they were involved in more fighting that cost Radike his company CO and best friend in the regiment. After New Georgia the regiment was pulled out for rebuilding and sent to New Zealand and later New Caledonia before beign sent back into action in the Philippines.

Radike's unit participated in the fighting on the main island on Luzon, including the fight against the Japanese 2nd Armored Division which provides a short look at some of the armored warfare that went on in the Pacific theatre. Eventually Radike was transferred to the rear echelon after being wounded and the rest of the book covers his experiences there and in occupied Japan.

As a memoir, the book does not provide a good overview of the entire war or the specific importance of the campaigns Radike participated in to the Pacific Theatre. For that reason I recommend it to the intermediate student of the war who already has a general knowledge of the overall conflict and can better see how Radike's experiences fit into that picture.

The book does provide a good look at the experience of a nationalized National Guard unit in the Pacific Theatre and many of the problems that such a unit faced both from the enemy and its own organization.

From a gamer's perspective there's not a lot here in the way of organization detail or specifics that can be used to build scenarios. The maps are few and general and don't serve to show the location of the specific incidents Radike was involved in. They are also merely geographical in nature and do not show any military movements. There is some interesting information on the fight with the 2nd Armored Division which could probably be used to generate some interesting scenarios.

The book only contains two pictures. One on the front cover which has no caption or attribution that I could find and one of the author in his uniform following his commissioning ceremony. As a memoir, it contains no bibliography. It also lacks an index. Fortunately, there is a serviceable table of contents and the book is not overly long. I had little trouble finding things again in order to write this review.

I would recommend this book to anyone with an interest in the experience of the average GI in the Pacific. Not the Medal of Honor winner or the guy who helped raise the flag on Iwo Jimo, but the average Joe who formed the bulk of the troops fighting in the Pacific.

Tuesday, June 20, 2006

Book Review: Panzer Tactics

Panzer Tactics: German Small-Unit Armor Tactics In World War II is by Wolfgang Schneider, an officer in the modern Bundeswehr (German Army), and someone who is developing a reputation as an historian of WWII. The book outlines tactics used at the battalion, company and platoon levels of a German armored formation.

The author does this by making use of Wehrmacht training manuals and of first hand accounts gathered "through hours of discussion with former Panzer soldiers of all ranks, evaluation of combat reports and accounts of personal experiences" along with his own experience as an officer in the modern Bundeswehr. Unfortunately, we have to mostly take his word for this as the book completely lacks a bibliography or footnotes of any kind.

What it does have is a large number of excellent photographs and reproductions of pages from Wehrmacht training manuals. I didn't do an exact page count, but it would appear that over half of the 352 page book consists of photographs, many used to depict the topics covered in the writing.

I found the pages from the training manuals and their accompanying translations are particularly useful in presenting basic tactical concepts.

The main topics covered include the following taken from the table of contents: Offensive Operations, Defensive Operations, Unit Movements, Reconnaissance, Command and Control, Logistics and Maintenance, Combined Arms Operations, Life in a Tank, Training and Tank Gunnery, and Armor Tactics-Today and Tomorrow.

Not having any actual military experience myself, I don't know how the tactics described might differ from modern practice, but I did learn something in every section. They give the reader a solid idea of how the Germans employed their armored units in battle.

I'm not sure how many of the details in this book would be useful in a game of Flames of War, but many of the basic underlying tactics should be useful if you haven't already learned them from other sources. The wealth of pictures should be useful to anyone modelling a german armored force, although they lack vehicle and unit identifications in the captions, so you need to already know how to visually identify German tanks to get full use out of them.

There is one thing I have to say against the book. Near the end of the book, in the Life in a Tank section, are a couple of photos of German tank crews interacting with Soviet civilians. Part of the caption says "these pictures show-contrary to many slanderous claims-how German soldiers behaved in their contact with the inhabitants." The Eastern Front was notorious for barbarous behavior on both sides. A couple of photos showing good behavior doesn't negate the very real atrocities commited by German soldiers in the Soviet Union. As a member of the Bundeswehr, I understand that the author wants to think the best of his predecessors in the Wehrmacht, but this kind of blatant misrpresentation left a bad taste in my mouth after what was a rather good book overall. For a more accurate picture of this issue I suggest that you check out "War Without Garlands" by Robert Kershaw (a review of which is coming soon).

I'd recommend this book to the intermediate student of history. The writing style is not too technical, but the nature of the subject is inherently a bit specialized for the beginner. As someone without a formal military background I found that it gave me a better sense of the point of view of an armor officer or trooper. I imagine that someone with a military background might get a better idea of the differences between their own experiences and those of a WWII German tanker. The advanced student should find the book interesting, but will also find that the lack of citations makes it less useful for serious study.

Thursday, June 15, 2006

The Next Step

First Game of Flames of WarContinued from Painting the Troops

So after finishing my tanks I managed to get in a game that I won 6-1 (Check out my post on Waryammer for the details). That inspired me to get my tankodesantniki finished so that I had my complete 1500pt force ready to go (minus the aircraft). So what was next?

Next was expanding that force by 500 points. The historical composition of my force was finished at the 1500 pt mark, so my only self-imposed historical limit was that anything I added should be historically possible. In other words, it should be equipment and units that actually existed in May of 1942. That wasn't much of a problem as most non-historical equipment was already denied to me due to using a mixed tankovy batalon organization.

So began the number crunching. I had 505 points to work with. First I looked at what I had. I had strong anti-tank capability against medium and light tanks. I also had good anti-infantry capability in the form of my T-60 tanks and my tankodesantniki equipped T-34 tanks. I had some anti-air and anti-tank capability agains heavy tanks with my Shturmoviks, but it was unreliable. What I lacked were reliable ways to deal with heavy tanks and aircraft. I also lacked infantry and artillery.

I also decided to get rid of my airpower, which would leave me further weakened in a couple areas. Airpower has a bad reputation among some Flames of War players, but for me it was mainly 120 points that I didn't need to paint. Now that I had my main force done I could replace it with something else. That left me with 625 points to work with for a 2000 point force.

After looking at a number of different options, I settled on the following: For 365 points I could add a full tank rider company. For another 250 I could add a guards rocket mortar battery (katyusha of one platoon with loading crews. That's a total of 615, leaving me at 1990pts. It would be nice to find another 10 points somewhere, but there really aren't any options I can take, so it's close enough.

Of course, this left me with the daunting prospect of painting 133 infantry figures (including the katyusha crews), plus assembling two of the most complex models in the Flames of War range (the aforementioned katyushas). On the other hand, painting the katyushas and their supporting trucks should be easy after my experience with the tanks.

With all that in mind, I decided to start on the infantry. I'll cover that process soon.

Continued in Painting the Hordes.

Tuesday, June 13, 2006

Book Review: The 25 Best World War II Sites, Pacific Theater

I picked up this book when my mom and I visited the D-Day Museum in New Orleans almost two years ago now. She was always encouraging me to travel more, and I thought this might give me some ideas of places to go visit. As it turns out, I have ended up visiting two of the top 25 (three actually, but I don't count #25 which is North America and includes the Museum where I got the book) and the guidebook was helpful, but it's best used as a supplement to more traditional travel guides.

The title is a bit misleading as each "site" actually contains up to dozens of individual points of interest located within a particular geographic area, many of which would qualify as "sites" all on their own.

The book begins with an introduction and explanation of how to use the book. It then starts listing the top 25 in order. Each section begins with a description of the role of the site in the war with suggestions for further reading. That's followed by a map with points of interest marked on it, along with a few basic facts including a description of the site today. The points of interest are then listed with a rating of from one to five stars, contact information if appropriate, and a description of why it's significant and what's there to see. Most sections then wind up with a description of major non-WWII related attractions in the area, general travel directions for the area, and a few hotel listings.

After the Top 25 there's a couple of pages devoted to sites that didn't make the list, a bibliography and an index.

The book makes a stab at being a general guidebook with some of the information, but I found it most useful as a supplement to more traditional guidebooks. It highlights points of interests related to WWII that a traditional guidebook might skip entirely, while the traditional guidebook does a better job of covering other attractions and finding food and accommodations.

I mentioned at the beginning that I've had the opportunity to visit a couple of the sites listed, those were both in the Philippines. #2 is the Island of Corregidor in Manila Bay, and #19 is Manila. The section on Manila was very helpful in identifying historically significant sites that I wouldn't have otherwise been aware of. My fiancee grew up in Manila and while she was aware of Corregidor, she wasn't aware of many of the sites in Manila itself, or at least not their ties to WWII. We only ended up visiting a few of them, but they were worth the time we took to do so.

I highly recommend this book if you have an interest in World War II and plan on doing any traveling around the Pacific Rim. Especially if you think you might end up in the Philippines as four of the sites are located there. Even if you don't plan on traveling, it's interesting to get an idea of what's still around today from the war.

I should also mention site 25 again, which is North America. It lists 25 points of interest scattered all across the US that have some connection to the war in the Pacific. Mostly museums. So if you live in the US you might consider picking it up even if you don't plan on actually traveling to the Pacific.

There's also a companion volume covering the top 25 sites in Europe, but I haven't read that one yet, so I can't comment on it, but they are both by the same author, Chuck Thompson, so I imagine it is probably just as good. If you are interested in it you can check it out here:

The 25 Best World War II Sites, European Theater : The Ultimate Traveler's Guide to Battlefields, Monuments & Museums

Thursday, June 08, 2006

Book Reviews

I'm an amateur student of history, and particularly of military history. Lately my focus has been on World War II, and as a result I've found myself reading a number of books on the subject. I figured I'd share some of what I've read in the form of book reviews. The purpose of this post is to go over just how I plan to do these reviews.

First, what I won't be doing. I won't be evaulating any works for historical accuracy, at least not based on my own knowledge. I'm a student without access to primary sources, so I have no way of checking accuracy except through comparison with other secondary sources. If I am aware of a problem with a work in this area based on the comments of others, then I will try to bring that up, but it will be a case of hearsay.

Now for what I will be doing. I will discuss in general what a book covers and what its focus is. I will try to give an idea of its writing style and whether or not it's more suitable for a beginner or a more advanced student of the subject at hand.

In order to do this I plan on having three broad classifications: Beginner, Intermediate, and Advanced. A book rated as Beginner will most likely be a well-written book that either gives a broad overview of the war or at least a significant portion of the conflict. Alternatively, a Beginner book might also be a highly readable narrative covering a more focussed topic, such as some of those written by Stephen Ambrose. It will be clear in the review why I rate a particular book as Beginner. Just because I rate a book as Beginner does not mean that it is not useful for a more advanced student, it simply means that it shouldn't put off a beginner with poor writing or a lot of technical language.

Intermediate books will be ones that are more focused than a Beginner book so that it would be useful for someone to first have a basic knowledge of how the subject being discussed fit into the overall war. These books are also likely to include a higher level of detail that might be discouraging to a beginner, but appreciated by someone who already has a working knowledge of the subject. Books that cover a particular campaign or books that are short but detailed might fall into this category. Many of the Osprey or Squadron/Signal publications that narrowly focus on equipment would probably fall into this category. Many post-war memoirs are likely to fall into this category as well. In fact, the majority of written works on WWII would probably end up rated as Intermediate if I took the time to rate them using this system.

Finally, Advanced books will most likely be books with a very high level of detail. These are books that would likely put a beginner to sleep, but which are filled with a wealth of detail that the more advanced student is likely to find fascinating, useful or both. These books unfortunately often suffer from an overly academic, or just plain poor, writing style, which is why I think it is worth clearly identifying them as for advanced study.

I will also try to mention if there is anything specifically applicable to wargaming. Either an explanation of strategy or tactics that help clarify how things work in a game, or the presence of useful orders of battle (OOBs) or maps that could help in planning scenarios or building forces.

There is one more thing that I will be doing that is unrelated to the actual review. If the book is available on Amazon, then I will put a link to it. I do this for two reasons. First, if you click the link to it and actually buy the book then I get paid some for the time I put into working on this site. Second, it gives me an easy way to show the book cover.

Hopefully some of you will get some use out of these reviews. I will be posting the first one soon (although it won't fit the above format exactly as it won't be a history book, although it is WWII related).