In discussing game design, particularly designs that attempt to simulate some real-world subject, it's common to hear the terms "design for cause" and "design for effect." It's easiest to show what these terms mean with some examples.
In designing for effect the designer generally has an idea of how the game should play and creates a set of rules that will result in that effect. An example of designing for effect in a simulation would be to look at the historical outcome of a conflict and attempt to model a game that achieves the same result with the same inputs. For example, during the early part of WWII Germany often defeated more numerous and better equipped foes in battle. A designer designing for effect will tailor his rules so that the same result will happen in the game.
In designing for cause a designer focuses on the details of the game elements and lets them determine the ultimate effect. An example of this design would be a game that focuses on the armor thickness of tanks and the penetration ability of guns. Easily quantifiable causes.
Most game designs incorporate elements of both methods, and Flames of War is no different. I think it helps to understand how the game works, and why it sometimes doesn't, if you recognize which design theory different elements of the rules follow.
For the most part Flames of War follows the design for effect philosophy of design which is what causes some gamers coming from other historical games problems. Games like Command Decision and other older systems tend to more closely follow the design for cause philosophy. The rule that states that it's the targets skill level that determines the number needed to hit is a classic example of design for effect. It's non-intuitive, but it results in the effect that the designer intended while still being simple to use.
Sunday, October 22, 2006
Saturday, October 14, 2006
Flames of War Battle Report
 It's been a while since an update. I don't have anything new in the form of painting to report on, but thought I'd write up my latest battles. This is a rewrite of a report I posted on Waryammer along with some photos from the game.
I played two 1500 point games with a Soviet Mixed Tankovy Batalon vs. a German Panzer Kompanie. Both of the armies were lists that I put together since my opponent is still learning the game, doesn't have any models of his own put together yet, and isn't familiar enough with the lists to put together his own.
Setup:
The rough organization for the two lists was as follows:
Soviets, 4 companies:
Light Company: 7 T-60
Medium Company: 9 T-34
Heavy Company: 3 KV-1e (1 taken out to make the Batalon commander)
Tankrider Company of two platoons with AT rifles and MG teams.
Germans, 3 platoons:
Command: 2 Pz IV F2, and a recovery vehicle that was pretty useless on this "table"
First Platoon: 1 Pz IV F2, 3 Pz IV F1
Second Platoon: 4 Pz IV F1
Armored Panzergrenadier Platoon with three squads and panzerknacker command team.
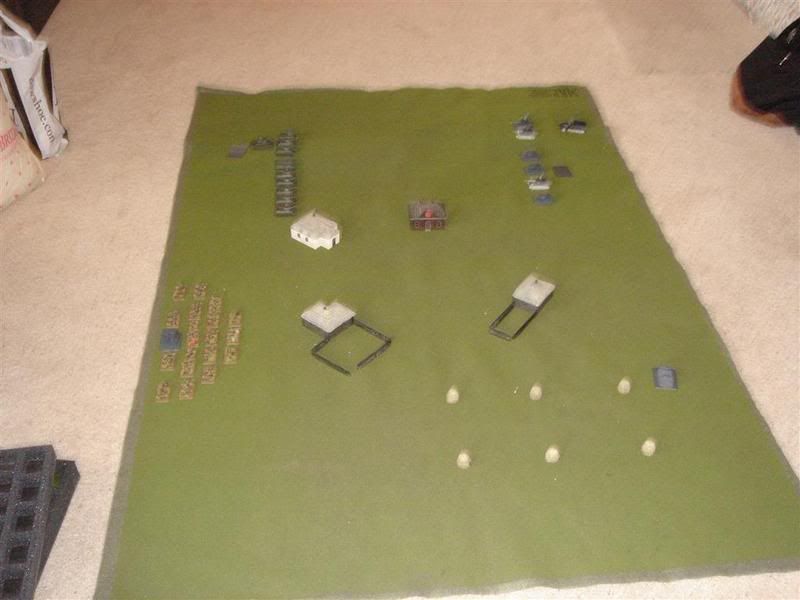
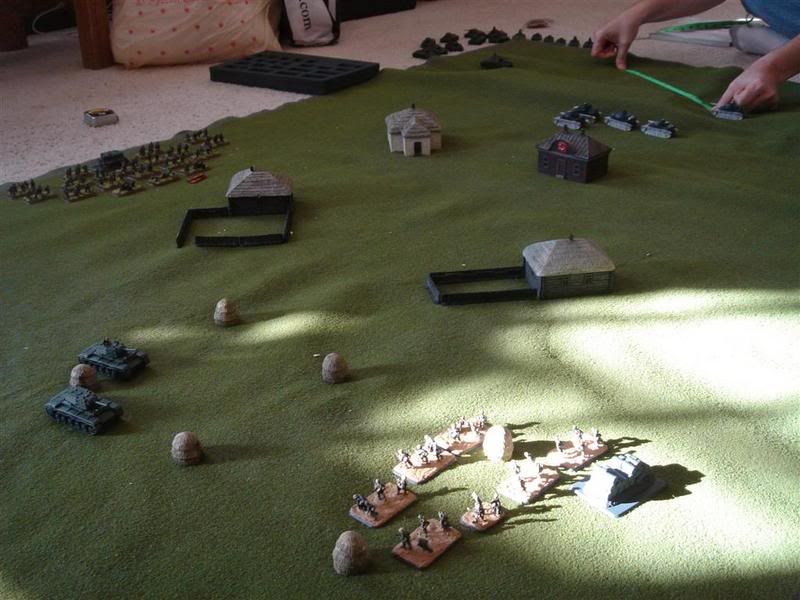
The "table" had a bare minimum of terrain. A couple of hills on one side, most of the contents of the Eastern Front "Battlefield in a Box" in the middle, and a field outlined using the haystack markers from the "Battlefield in a Box" on the other side. It's hard to see the hills in some of the photos because they were made by simply putting some VHS tapes under the battle mat. We rolled to determine the scenario and got Encounter.
I elected to keep my light and heavy companies in reserve, he kept his panzergrenadiers and second platoon in reserve.
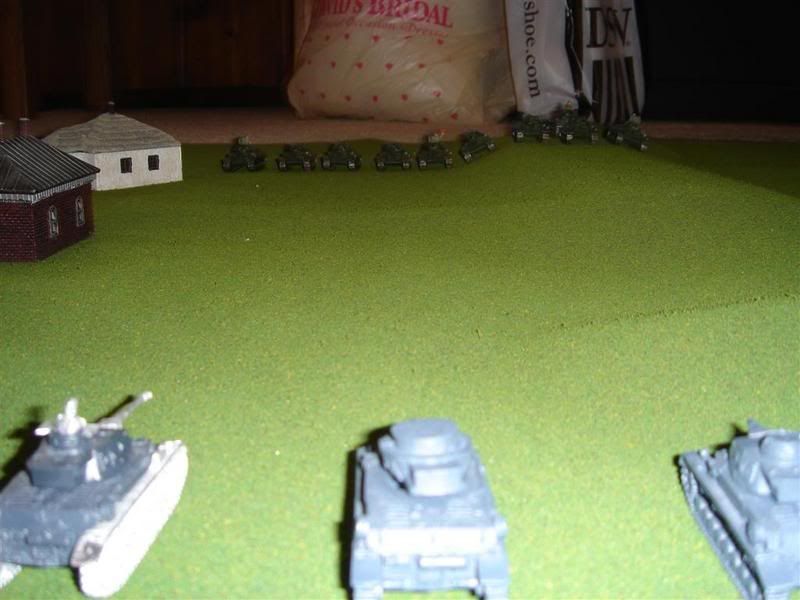
He had to place first and put out his first platoon near his right hand objective. I put my infantry around my right hand objective, then placed my medium company opposite his first platoon. We each then placed our commanders. You can see the overall setup in the slightly blurry first pic above, and a view from the German point of view below. Ignore the upside down turret on the Pz IV. It wasn't knocked out, it just got set up that way somehow and I didn't notice it until after I took the picture.
Game 1:
After setup he got to go first and made a rather grave tactical error. He's only played in two games before, both of which were on tables with a large amount of terrain, and it's been a while since I played on a more open table. As such neither of us thought about it that much when he chose to charge my medium company with his first platoon and command elements. They took out one of my tanks, and then on my turn I chose not to move and simply returned fire. Sixteen shots can do a lot of damage, even to Veteran troops. He ended up losing everything in that one round of combat, forcing a company command check at the beginning of his next turn which he automatically failed for lack of a company commander.
Well, that was quick.
Game 2, Turn 1:
We decided to just start over with the same forces and the same scenario. This time I got the first move and moved towards his forces, but trying to keep the hills between me and him for as long as I could. I couldn't hide from his entire force though, so he got some shots off at long range on his turn and took out a couple tanks.
Turn 2:
The next turn I was thinking I could double time between two hills so that he couldn't get shots off at me in the open, but I had forgotten about the rule on double-time movement that says you can't get within 8" of an enemy unit. His command teams on the hill thus prevented me from using double-time to get to where I wanted to go.
Instead, I went ahead and moved in between both hills and into the line of fire of his first platoon. I only moved 6" so I could get off some shots, and did some damage, bailing one and killing one, but neither of those was a Pz IV F2. On his turn his three F2 tanks were now in range and tore me apart, but I was able to make my motivation check.
Turn 3:
Turn three I was able to try a roll for reserves but failed. I then moved my remaining T-34s into position and managed to take out another of his tanks from the first platoon. Since the bailed tank was still bailed he was forced to take a motivation check and failed. Things weren't looking too good for him at this point as he'd have to make a company morale check to stay in the game unless he got some reserves on the table.
Fortunately for him he made his check; unfortunately he didn't get any reserves so he'd have to make another check the next turn. He did manage to knock out another T-34, but I passed my motivation again. I was now down to 3 tanks in my medium company, so it wasn't going to last much longer either.
Turn 4:
Turn four was looking good for me at first. I made both reserve rolls and my remaining T-34s moved to take one of the objectives. Unfortunately, my heavy company came in on the opposite corner. I was hoping my light company would come on there, because they could almost reach the undefended objective on that side of the "table" in one turn if they double-timed.
I decided to double-time both my heavy and light platoons. This worked out for my heavies that managed to avoid breaking down due to being unreliable. It wouldn't work too well for my poor T-60s, but we'll get to that in a moment.
I still couldn't get rid of his pesky command elements, but things weren't looking good for him. He had a swarm of T-60s moving up behind my remaining T-34s all headed for one of his objectives while the heavies were slowly moving towards his other objective. He was going to have to make a company morale check, and even if he made it I was going to grab an uncontested objective. Unless, that is, he got some reserves in the right place.
On his turn he made his motivation check, and was successful on both reserve rolls! His panzergrenadiers came in on the corner close to the objective my heavies were going for, and his second panzer platoon came on to support his company commander.
It was at this point that we ran into a question on double time vs. someone who moves and fires. RoF drops to one if you move and fire, but if your target double-times you double the firing dice. It's unclear if a moving shooter should get RoF 2 against a target that double-timed, but that's the way we decided to do it. As a result I lost my entire light company to fire from the second panzer platoon in one round of shooting.
In the meantime the command tanks took out my medium company commander causing the remaining two tanks to automatically fail their motivation check.
Turn 5:
At this point I flinched. I should have continued to go for the other objective, but I'm not that familiar with tank vs. infantry combat and I decided to fall back instead and force him to go on the offensive. After all, I had my infantry dug in on one objective, and my batalon comander was sitting on the other in his KV-1e. So, I decided to try to move my other heavies over to help out the batalon commander.
He decided to try to take my commander with his remaining tanks after I carefully explained the odds to him (for example, that it was impossible for his Pz IV F1 tanks to do anything to me from the front, so he'd have to come at me from the flanks to have a hope of doing any damge with them).
He moved his command tanks up one side of the hill and his second platoon up the other side to try to keep in cover as they approached my commander.
Turn 6:
Unfortunately for him, I was able to move into a firing position, and despite needing a 5+ just to hit managed to take out his 2iC. At this point his odds of winning a fight with my commander dropped, but he decided to press on. In the meantime I wised up and realized that it would take forever to move my other heavies to a position where they could help my commander, and that they stood a fair chance of forcing his panzergrenadiers out of position if they assaulted, even though his panzergrenadiers had managed to get into the cover of the wheatfield and dig in while I'd foolishly backed off.
 Turn 7:
Turn seven saw me move my commander again and take a potshot at his second platoon, but I missed. My heavy company assaulted his panzer grenadiers forcing them to fall back after losing a team, but they were still in range to contest the objective.
He moved up all his tanks into firing positions against my commander, but wasn't quite able to get on my flank. He did get a hit from his commander, but I made the armor save.
Turn 8:
On Turn eight on the other side of the table I shot his panzergrenadiers with my tanks' MGs but only destroyed one stand, while the following assault didn't get any. Their failed tank assault check forced them to break off again, but they still managed to stay close enough to contest the objective.
Meanwhile, my commander had missed both of his shots at the panzers.
On his turn, my opponent managed to surround my commander and take him out with a flank shot by his commander. He was now on the objective and it looked like he would win at the beginning of his next turn as there was no way for me to contest his control of the objective.
Turn 9:
I almost conceded, but decided to fight out the last turn for points if nothing else. I fired up his remaining panzergrenadiers with the MGs of my heavy company and this time the results were much better, taking out all his remaining MG teams and leaving only his command team which then failed its motivation check. This in turn would force a company morale check at the beginning of the German player's turn, before the check for victory conditions, something that I hadn't thought of until that moment.
So, the whole game came down to one die roll with a 50/50 chance. 4+ and the Germans pass and win for holding the objective. 3- and the German commander suddenly decides that he's had enough and retires from the field. The roll: 3. Soviets win!
Conclusion:
The second game played out a lot like the kind of actions I've read about occurring during 1942 in Russia. Handled well, the Germans could take the more numerous Russians as seen in how they dealt with my medium and light companies, dishing out massive tank casualties compared to what they took. They still had trouble with the heavies though, which just kept taking everything that the Germans could throw at them. Usually only well executed flanking maneuvers stood a chance of taking them out, which is exactly what happened in the game.
Even though he didn't have any 88s or big cats to deal with my heavies, the German player still came within a single die roll of winning the game. Overall one of the better games I've had in a while despite only being 1500 points and on a "table" largely devoid of terrain.
Subscribe to:
Posts (Atom)
