Showing posts with label Painting. Show all posts

Sunday, August 05, 2007

StuGs and 8-Rads

Continued from Fallschirmjagers.

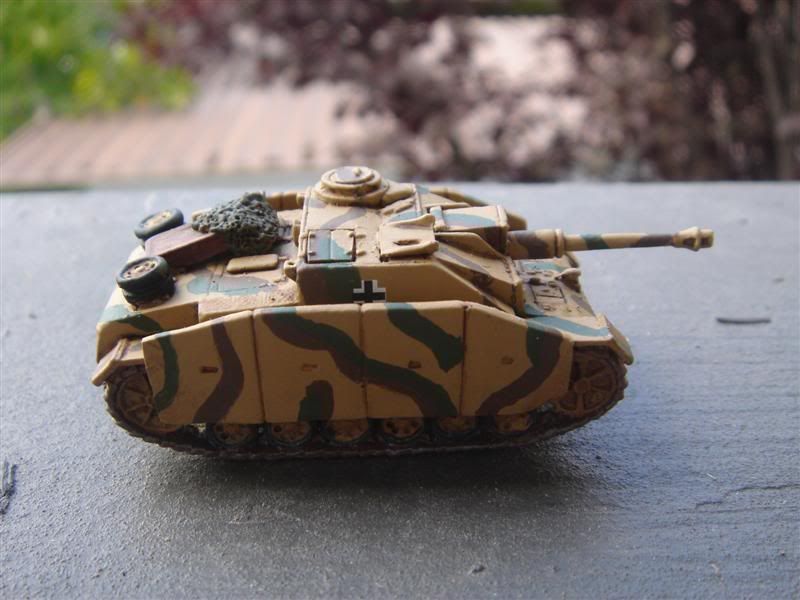
I've been working on my Fallschirmjagers quite a bit lately, including some of the vehicles I plan to use to support them. As you can probably tell from the title of this post, those will include some Sturmgeschutz IIIG assualt guns (StuGs) and SdKfz 231 armored cars (8-rads). The 8-rads are purely a point-filler for my 800 point Infantry League force. Ninety points for a pair of 8-rads is a cheap way to give my force another platoon, plus some much needed mobility. By saying that they are a point filler I mean that the choice to add them to the force was based on game rather than historical factors.

The StuGs won't see use until I expand to a full 1500 or 2000 point army. Unlike the 8-rads, the StuGs are a solid historical choice for supporting my fallschirmjagers. They were often attached as support throughout the war, and in the late war period there were at least two fallschirmjager sturmgeschutz brigades.

Unlike my Soviets, which are based on forces that fought in a specific battle, my fallschirmjagers aren't based on a specific unit or point in time. Rather, they are meant to serve as any fallschirmjager unit in a European setting (east or west) from '43 to '45. More specificaly, I want them to be able to serve as both a reasonable op-force for my Soviets on the Eastern front during the mid-war, and as any of the fallschirmjager units fighting in Normandy or during Market-Garden during the late-war period.

For my vehicles this means a dunkelgelb as opposed to a dunkelgrau paint job, or so I thought. When it came to the 8-rads things actually become a bit more complicated. Whenever I start to paint a new type of unit or vehicle I try to do some research to find out the best way to do this. Most of the time this involves some web searches and the purchase of an Osprey book or similar book. In exploring 8-rads I ended up getting both and Osprey book on German armored cars and a Military Vehicles in Detail book specifically on 8-rads.


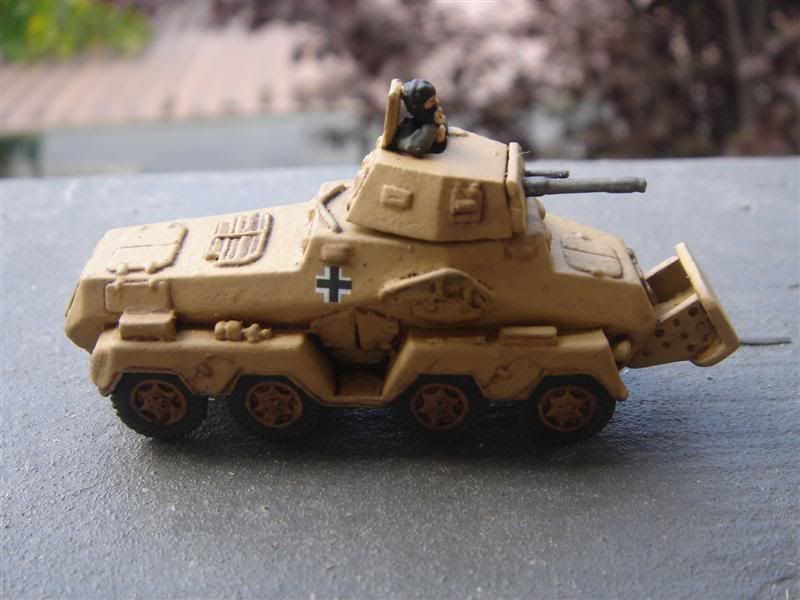
I had two main concerns, The first was whether or not to put the cow-catcher like device (called a pakschutz) on the front of the vehicle, and the second was how to paint the vehicle. My initial research based on the web and the Osprey book indicated "yes" to the pakschutz and a dunkelgelb paint job, so that's what I started with. Unfortunately, after I got the book specifically on 8-rads I discovered a few things. First, the SdKfz 231 that is sold by BattleFront actually stopped production in 1942. After that only the command model, the SdKfz 232, was produced, and that most of these appear to have been produced with thicker armor instead of the external pakschutz.

While early versions of the SdKfz 232 featured large wire frame antennas, advances in radio technology meant that later versions were very similar externally to the 231 and identical in combat performance (the difference was the better radio). As a result, it would appear that the unit in Festung Europa is actually meant to represent this model rather than the one actually listed in the book.

After finding all this out I realized that 8-rads probably either had the pakschutz or were painted dunkelgelb, but that it's quite possible that there was never an 8-rad with a pakschutz painted dunkelgelb. By the time I figured this out I had already painted the base coat on the models with the pakschutz attached, so I just decided to go with it instead of starting over. My story is that these are older 8-rads that were re-painted dunkelgelb.

As for camo, despite these being used as reconaissance vehicles, I found few pictures showing them in camo, so I decided to leave mine plain dunkelgelb.


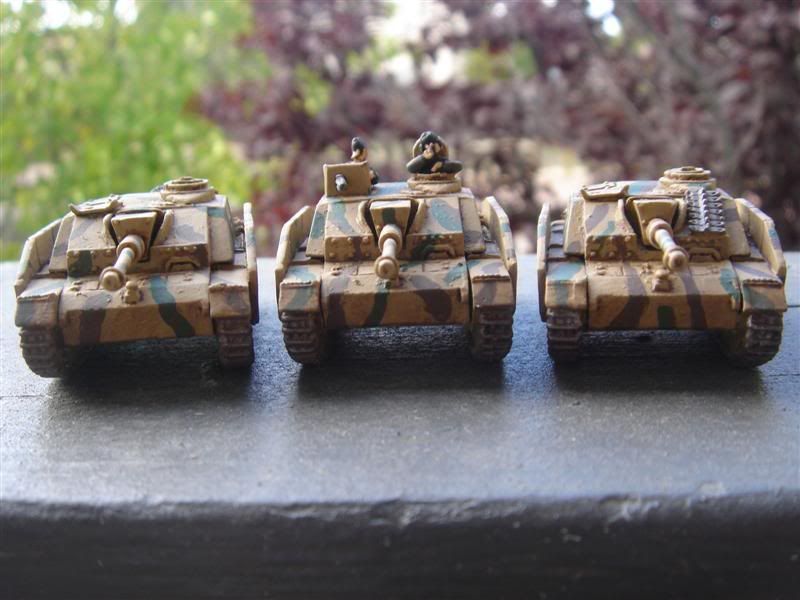
The StuGs were a different matter. Since I plan to eventually use them as support in Normandy, I tried to find out what paint job the fallschirmjager StuGs used there. Unfortunately, I wasn't able to find any definitive sources. Instead, I ended up doing a variation on a couple different '43 and '44 camo schemes that I saw in books and photos. I also took inspiration from a picture I've seen of tank camo being applied with a mop. I figured the brush I was using was pretty close in scale to what was actually used to paint the tank, so I didn't worry too much about cleaning things up.

I don't like to do much weathering. It's probably more realistic to paint on a lot of dirt and mud, but I prefer a cleaner look to my models for the tabletop. I limited the weathering to a bit of dirt drybrushed onto the tires and mudguards. The final detail was to apply balkenkreuz decals to the sides of all the vehicles.

That should do it for my vehicular support for my fallschirmjager. Now to continue on with the infantry. I'm almost done with the first two platoons. Next up is assembling and painting a mortar platoon, probably followed by either an MG platoon, AT platoon, or 3rd infantry platoon. My goal is to eventually have all combat, weapons and non-divisional support options available for both mid and late war.
Wednesday, July 11, 2007

Fallschirmjagers


A while back our group started talking about doing an 800 point infantry league, so I decided to start looking at what kind of force I could put together. Of course, I could continue my Soviet force, but this was an opportunity to get another army started.

I was very resistant to the idea of doing an elite force, but the more I looked at it the more I thought that doing that kind of force would be the best way to go. So, that meant probably SS, Fallschirmjagers, Rangers, or Parachute Infantry. Since I was still looking for an opposition force to my Soviets, I ruled out doing another allied force early on. That left the Germans. A Waffen SS force might have been interesting, but there are a lot more resources for the Fallschimjaegers that are readily available, plus they don't have the same kind of political overtones that the SS obviously have.

Later, after doing some more historical research, I discovered that while there were no Fallschirmjagers involved in the Second Battle of Kharkov, there were some involved in heavy fighting further north near Leningrad just a week prior to the fighting around Kharkov. So, while whatever force I end up building won't be an accurate opponent for my main force, they would be one for a similar force from the same period.

The idea now was to create a force that could be used with reasonable accuracy both on the Eastern front in mid-war, especially mid-1942, and preferably also in late-war Normandy and Market-Garden since at least one member of our group is working on a late war allied force.

Of course, that dictated a european as opposed to a mediteranean color scheme. I decided that the majority of the models would be wearing the european splinter camo jump smocks and helmet covers but with a few scattered plain green smocks and covers since my sources indicate that they were used throughout the war by some individuals and units. One of the photos I have even shows a full squad in Normandy with the old smocks.

The next thing to do was to come up with a paint scheme. There are three published painting guides from Battlefront for fallschirmjager, all three of which differ to some degree from each other. In addition to those, I looked at a couple Osprey books and an old squadron/signal book for color scheme ideas.

I ended up using mainly the first and second Diving Eagles books with some supporting evidence from the Osprey book German Airborne Troops 1939-45, and came up with the following scheme:

Basecoat: spray black
Helmet: German Grey (995), Green Grey (886), or splinter camo
Smock: Green Grey (886) or splinter camo
Pants: German Fieldgrey (830)
Faces and Hands: Flat Flesh (955)
Boots: Black (950 or just the undercoat)
Rifle butt, canteen, helmet band: Beige Brown (875)
Gun Barrels: Gunmetal Grey (863)
Ammo Pouches, breadbag: German Camo Beige (821)
Webbing, Pistol Holster: Chocolate Brown (872)

Splinter Camo
Base: German Camo Beige (821)
First Color: German Camo Medium Brown (826)
Second Color: Reflective Green (890)

The webbing was actually the hardest color to pin down. The first Diving Eagles lists Chocolate Brown, the second lists Black, and the latest in Ostfront doesn't list anything. The Osprey book mentions that Luftwaffe forces regulations called for brown leather while Wehrmacht called for black leather. As a result, Fallschimjaeger used mostly brown webbing, with an increasing amount of black Wehrmacht gear mixed in as the war went on. Since my force is based primarily on an early-42 force, I decided to go with the brown webbing for the entire force.

I use the techniques described in the second Diving Eagles book for painting the splinter camo. The base coat over the whole smock/helmet cover. The German Camo Medium Brown in geometric shapes on top of that, with Reflective Green geometric shapes on top of that with some green lines in the spaces left.

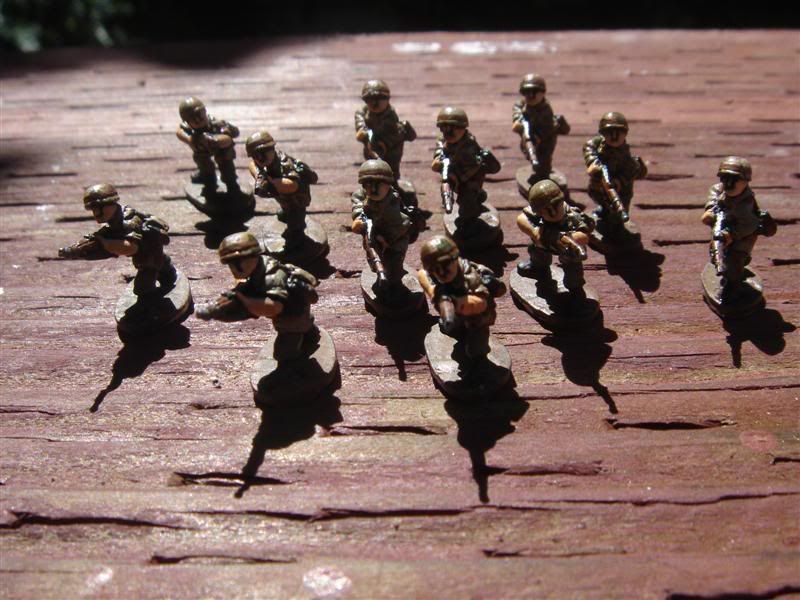
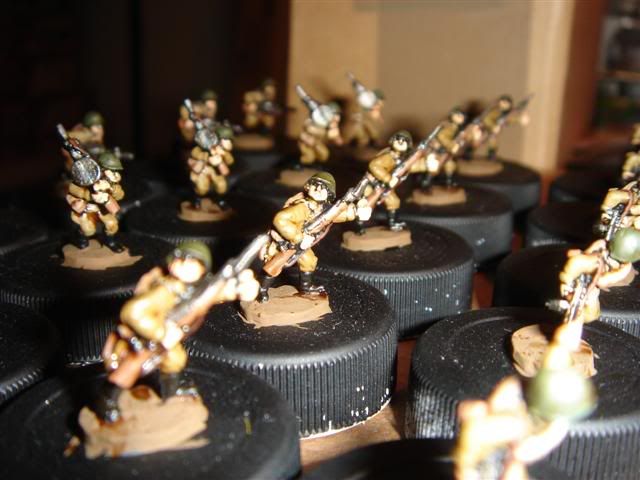
So far I've only got a dozen finished soldiers (seen above), but I plan on making them my primary painting project now, so I should be able to get some more done soon. First up is the rest of the fallschirmjagerkompanie box, and a couple of 8-rad armored cars. That will give me enough to field a force supported by the Italian carri platoon that I painted up years ago.

Continued in StuGs and 8-Rads.

Sunday, July 30, 2006

Basing the Hordes

Continued from Painting the Hordes


With a horde of little Soviet soldiers all sitting on plastic bottle caps garrisoning my table, it was time to begin the basing.

I set myself two main rules for the basing. The first is that it had to be simple to do. I have a lot of bases to do. The second is that it had to be a method I could easily use on the pre-cast bases on Battlefront's one-piece resin vehicles.

I recently used a very simple basing technique on some larger fantasy miniatures, but it involved using a sand base, which is ruled out by my second restriction of being able to use the method easily on pre-cast bases. Still, I like the method, so I decided I'd use a variation of it. Instead of a sand base I used a pumice base (Vallejo White Pumice) mixed with a darker brown color (Vallejo Model Color 826 German Camo Medium Brown).

I applied the pumice to an empty base, spreading it evenly to an approximate depth equal to that of the base of one of the miniatures. I then put a dab of white glue on the bottom of each of the miniatures and pressed them into the base. Using a sculpting tool, I then smoothed the transitions between the bases and the pumice and removed any extra pumice.

It's easier to spread the pumice onto the empty base than to try to spread it around pre-glued miniatures. I used white glue instead of superglue in the hope that it will be easier to remove figures from the base if I ever want to rebase them. The combination of the white glue and the pumice seems to hold them in solidly.

I mentioned that I mixed the pumice with a dark brown color before applying it to the base. This results in a light tan color that looks pretty good when inked over, but once again this breaks my second rule since I can't easily achieve the same light tan on a pre-cast base, so when it dries I paint over it with the same dark brown color.

After finishing the tank rider company using the above method, I don't think that I will continue to mix the pumice with paint in the future. Instead I'll simply paint over it. This should speed things up a bit and I don't think it will effect the final results.

At this point I originally tried inking the base, but found that any extra detail it brought out in the base was countered by the fact that it emphasized the differences where the pumice meets the edge of the bases of the miniatures. So I decided not to ink the base.

After everything dried I applied some static grass using it both to add some character to the base and to cover up any major flaws in the application of the pummice. I used the same method that I described in the writeup on my dwarf miniatures.

Once the glue dried on the grass I chose a slightly lighter brown (Vallejo Model Color 983 Flat Earth) to paint the edges of the base, and then it was on to the final step of the protective clear coats. I used my standard method of one coat of Testor's Gloss Cote followed by one or two coats of Citadel Matte Varnish.

I'm rather pleased with the results. The bases are nothing special, but I think they do their job of showing off the figures without distracting from them.

I'll save talking about my future plans for this force for the next article.


Continued in The Horde Grows.

Thursday, July 27, 2006

Painting the Hordes

Continued from The Next Step.

While there's not much assembly involved in Soviet Infantry, there is a good deal of preparation involved. I started by buying the Strelkovy Company box and an extra Strelkovy Platoon blister. This gave me most of what I needed to make a full strength Tank Rider Company, plus several extra troopers since a Tank Rider platoon is smaller than a Strelkovy platoon. This is useful since there always seems to be a few damaged or miscast models in a package.

Unfortunately, there are a few other differences between a Tank Rider company and a Strelkovy company, mainly in the options they can take. I wanted to take both a machine gun platoon and an anti-tank rifle squad. Strelkovy companies don't have anti-tank rifles as an option, and only take a single machine gun squad instead of the two present in a platoon. Since neither machine gun nor anti-tank gun squads appear in Battlefront's special order catalog, that meant I was going to have to buy a whole company blister of each in order to fill out my Tank Riders.

I decided to put off that purchase while I got started on my infantry. As I cleaned each model of any extra flash, and straightened any bent weapons, I then sorted them into rows of identical models. This was so I could paint a group of identical models together, which was to prove helpful in speeding the painting process. I also took the worst of the damaged and miscast models and set them aside.

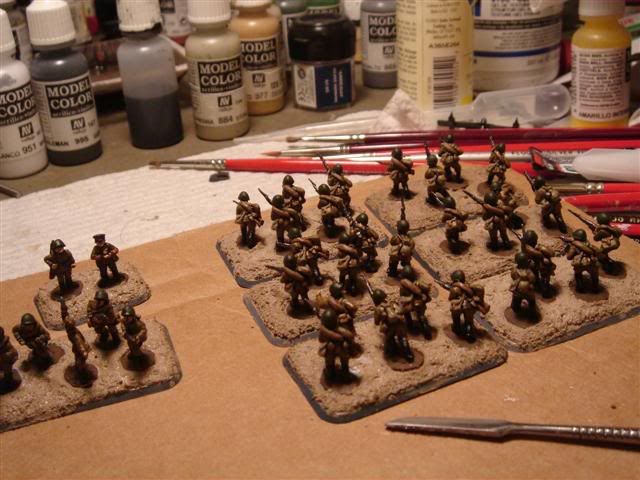
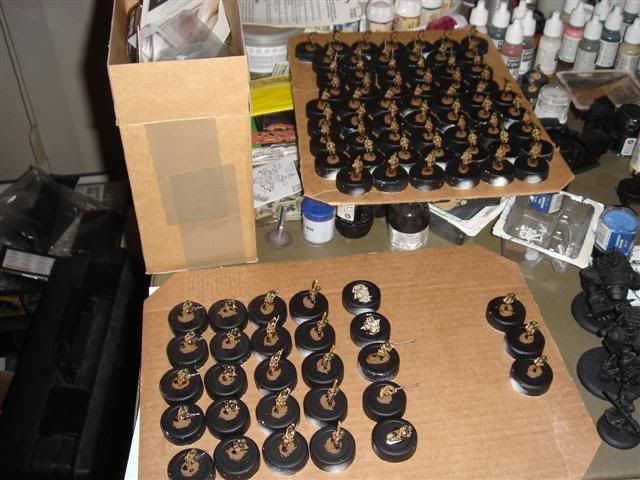
Next I took all the individual models and glued each one to a plastic cap from bottled water using a dab of Elmers' white glue. This gives me something to hold while painting the model. After the model is painted, then I can just pop it off the cap, clean up the bottom if necessary, and stick it on a base.

After that I painted them pretty much the same as I did my tankodesantniki, the only differences being that I tried to pay a little more attention to detail on the face and where different base colors met so that there was a bit of black left as a border. I didn't worry too much about this, just enough so that the wash effect was enhanced a bit.
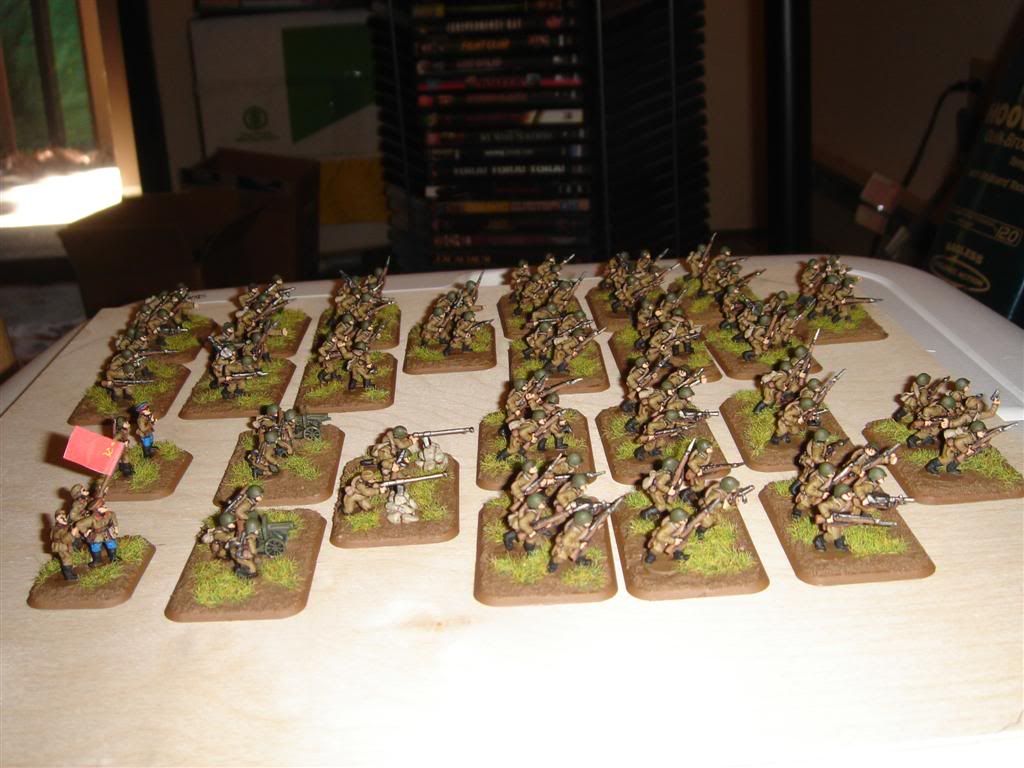
After this, all that was left was the basing, but I'll go into that next time, along with what I plan to add to this force to bring it to 2000, 2500 and even 3000 points. I'll also go into the changes that I had to make in order to become compliant with the 2nd edition rules of Flames of War.

Continued in Basing the Hordes

Tuesday, June 27, 2006

Magic Wash

I mentioned "magic wash" in my Painting the Troops post, but I didn't mention what it was. Magic wash is basically a wash that uses Future floor wax (or its equivalent outside the US, see the link for more info) as part of the mixture.

I've seen similar formulas described elsewhere, but the first time I saw it referred to as "magic wash" was on the Flames of War forums, and most of what I know about it comes from posts made there.

The exact ratio of wax to ink to water varies tremendously. The mix I currently use is 3 parts water to 1 part Future to 1 part GW ink. I've seen ratios that call for much less ink (just enough to get a shade). I've seen ratios that use much less water, even to the point of just being wax and ink. As with most painting techniques, the best thing to do is to just experiment.

I make the mixture in an empty Vallejo paint bottle for easier use and storage.

The purpose of the "magic wash" is the same as any other wash, but the Future helps break surface tension which lets it flow more freely into crevices and depressions on a miniature with less pooling on flat surfaces. The result helps bring out details while helping to smooth transitions between different areas of color on the miniature.

I've only used the method on 15mm miniatures so far, but I plan on giving it a try on some larger scale stuff later to see how it does.

I've found with my Soviet infantry that it really helps cut down on my painting time, but I'll go more into that when I can take some pictures of the infantry I've gotten painted so far.

Tuesday, June 06, 2006

Painting the Troops

Continued from Assembling the Troops

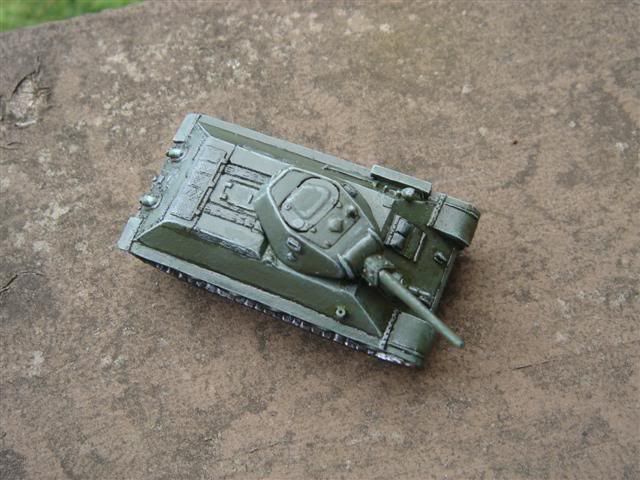
Now my tanks were all assembled, I "just" needed to get them painted. Fortunately, I already knew how I was going to do this. While I'd been assembling, I'd also been trying out some painting techniques on that T-34 obr 1942 model that I'd already built (once again my foolish purchases have a positive effect). This let me establish the method I was going to use to paint my tanks:
  1. Basecoat with Testor's Medium Green paint
  2. Paint the treads black (in the future I'll skip this step)
  3. Paint any exposed crew and rubber wheel details black
  4. Paint the treads Vallejo Model Color 983 Flat Earth
  5. Drybrush the treads with Vallejo Model Color 863 Gunmetal Grey
  6. Wash the entire model in black "magic wash"
  7. Paint over the hull with Vallejo Model Color 894 Russian Green, leaving the wash showing in the details
  8. Highlight the edges and details with a 50/50 mix of white and Russian Green.
  9. Do any exposed crew in the appropriate colors with a brown "magic wash" over them
  10. Spray Testor's Gloss Cote over the model for protection
  11. Spray Citadel Matte Varnish for looks
  12. Drybrush "dirt" using Vallejo Model Color 983 Flat Earth for weathering effect (I haven't actually done this on any models other than my test model, but I still plan on doing it eventually)

The biggest time consumer in the process was the treads. That's one reason I'm going to skip the first black coat in the future, the other is that I just don't think it's necessary.

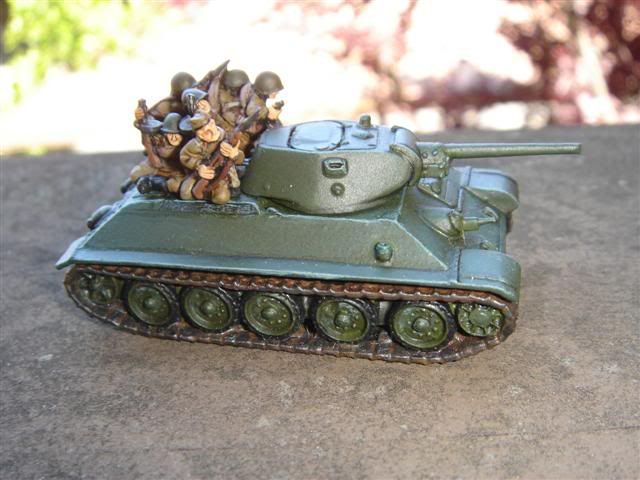
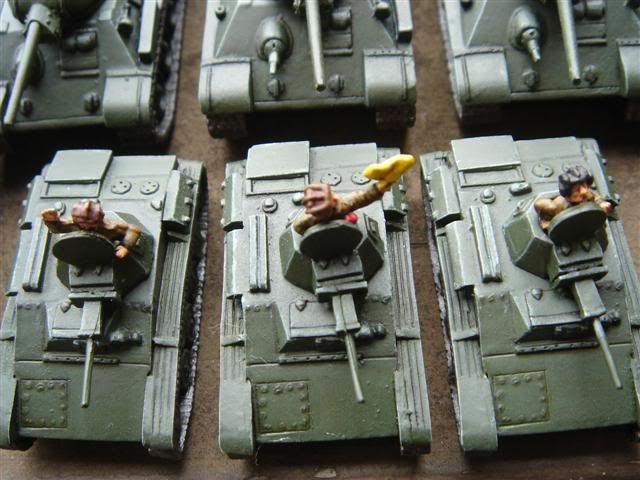
Unfortunately, I didn't take any pics during the process of painting, but I can show the final result:


For the tankodesantniki I followed a similar process:
  1. Basecoat in Citadel's Black Primer
  2. Paint the appropriate colors using those suggested in the Stalingrad book for Flames of War
  3. Wash with brown "magic wash"
  4. Spray Testor's Gloss Cote for protection
  5. Spray Citadel's Matte Varnish for looks

I didn't make much effort to leave the basecoat showing as a shading effect, instead relying on the wash to achieve that. I was not completely happy with how this turned out, so when I decided to do some more infantry models I change the process just a little. That's a subject for a later post.


Continued in The Next Step

Wednesday, May 31, 2006

Assembling the Troops

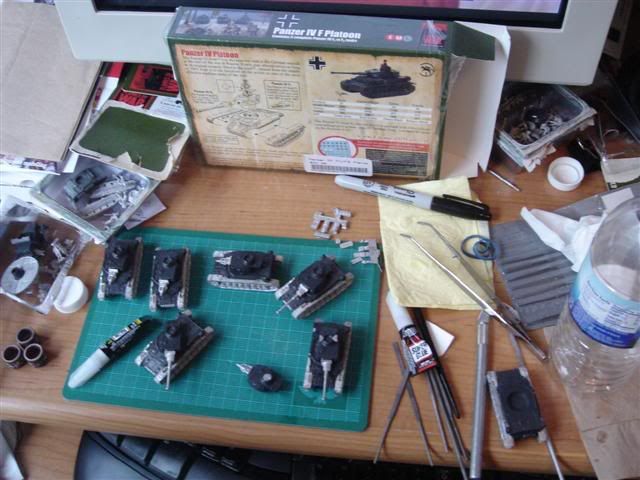
Panzer IVs Under ConstructionContinued from The Beginning

In the last post I discussed how I finally settled on the army I was going to make. Unfortunately, I'd already started buying miniatures before making my final decision. This left me with a box of T-34 obr 1942 tanks and a box of KV-1s tanks that I wasn't going to need. Plus, I'd opened both boxes and actually assembled one of the T-34 tanks before I figured this out.

Fortunately, neither was a completely wasted purchase as I ended up using them in various ways during the assembly and pre-painting process. That didn't change the fact that I still had models to buy. With that in mind I went to two sources. First, I went to my local FLGS, Black Diamond Games, and bought what they had on hand. Then I placed an order with the Warstore for the rest of what I needed.

It was shortly after I placed my order that I realized that I'd made yet another mistake, I'd ordered too many T-60 tanks! As it turned out, this also ended up not being a completely bad thing (except for my wallet).

I made a decision early on that I wasn't going to model the aircraft right away, just the tanks. There was already a rumor that Battlefront would be releasing their own aircraft models, so I decided to wait and see what they came out with rather than hunting down my own.

Assembling all the tanks took a bit of work. I had more than one T-34 hull that had broken bits, one of my T-60 hulls was warped out of shape, and all but one of my KV-1e models were missing their turret hatches! In the past this wouldn't have been much of a problem as Battlefront used to have an extremely fast turnaround on replacement parts. Unfortunately that turnaround time is now measured in months, so my goal of "quickly" building and painting an army was in jeopardy. This is where my earlier foolishness in buying models I didn't need actually helped me out. T-34 obr 1941 and T-34 obr 1942 tanks use the same hull, so I was able to swap out some of my damaged ones for good ones from the box. I had over-ordered T-60s, so one warped hull still left me with enough models. Finally, as it turned out, KV-1e tanks and KV-1s tanks use the same turret hatch. That left me set to go.

The KV-1e and T-60 tanks were relatively easy to assemble. The T-34 tanks were a bit more of a problem. The treads don't quite match up with the body and several of the turret holes were just a little too small for the turrets which meant that the turrets couldn't be turned freely. This required a bit of filing and dremel work to get things lined up properly, but it wasn't too big of a pain.

The only thing left was the tankodesantniki. These were a late addition to my list, and broke my original rule of not having any infantry models in my army. I bought the models, but decided not to work on them until after I had finished the tanks, which is what I'll discuss in my next post in this series.

Just for clarification, the picture that starts this piece shows German and not Soviet tanks. I didn't think to take any pictures of my Soviet tanks when they were under construction. The Panzer IVs in the picture above are part of one of my other projects which I'll discuss in the future. Here's some of my Soviets "assembled":

T-60s and T-34s On Review

Continued in Painting the Troops